Install Java, MVN and deploy application
Install Java and MVN
- Switch root account, update.
sudo su yum update

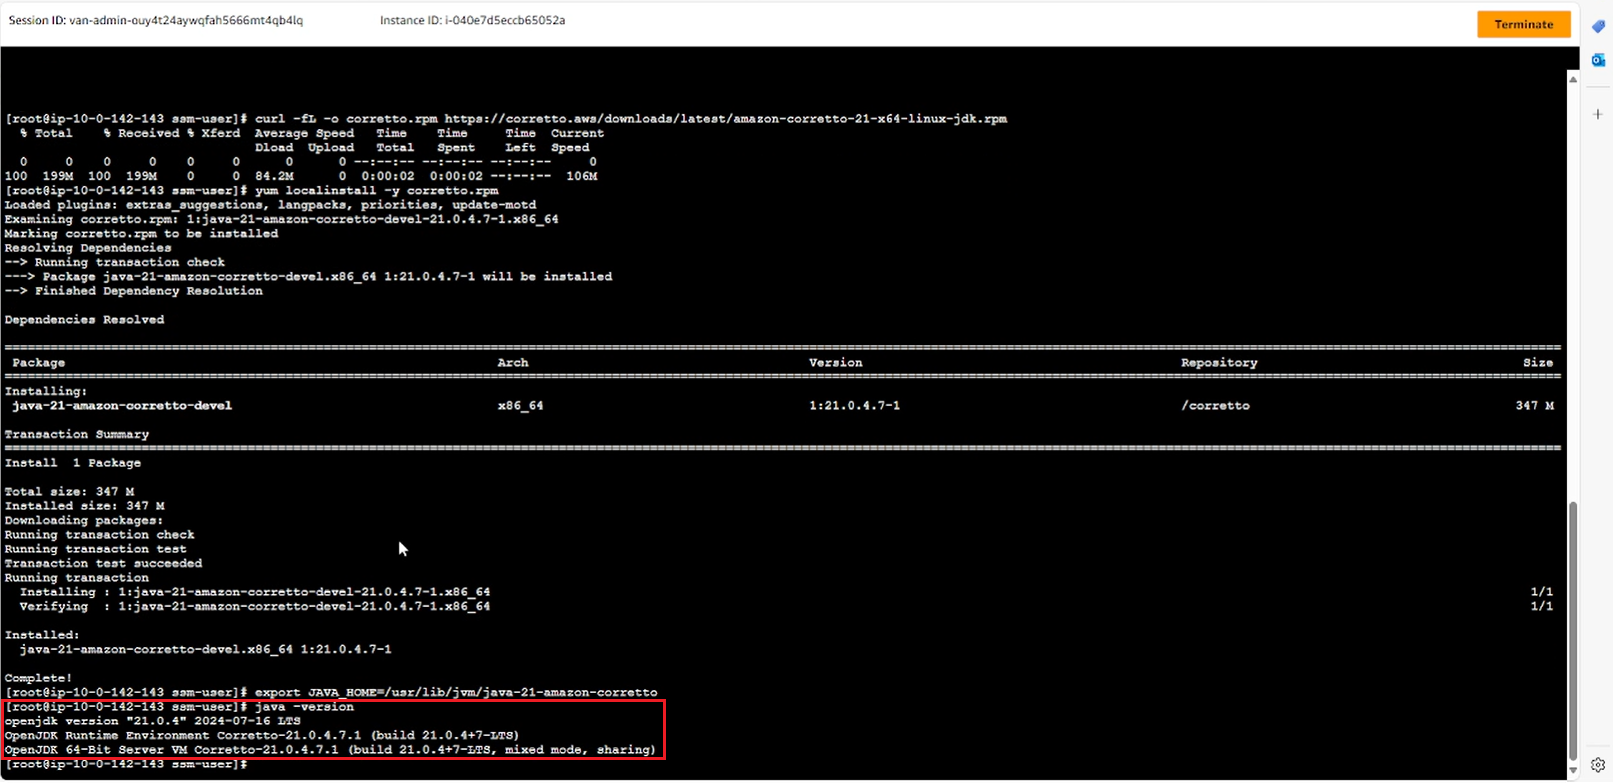
- Install Java 21
curl -fL -o https://corretto.aws/downloads/latest/amazon-corretto-21-x64-linux-jdk.tar.gz export JAVA_HOME=/urs/lib/jvm/java-21-amazon-corretto java -version
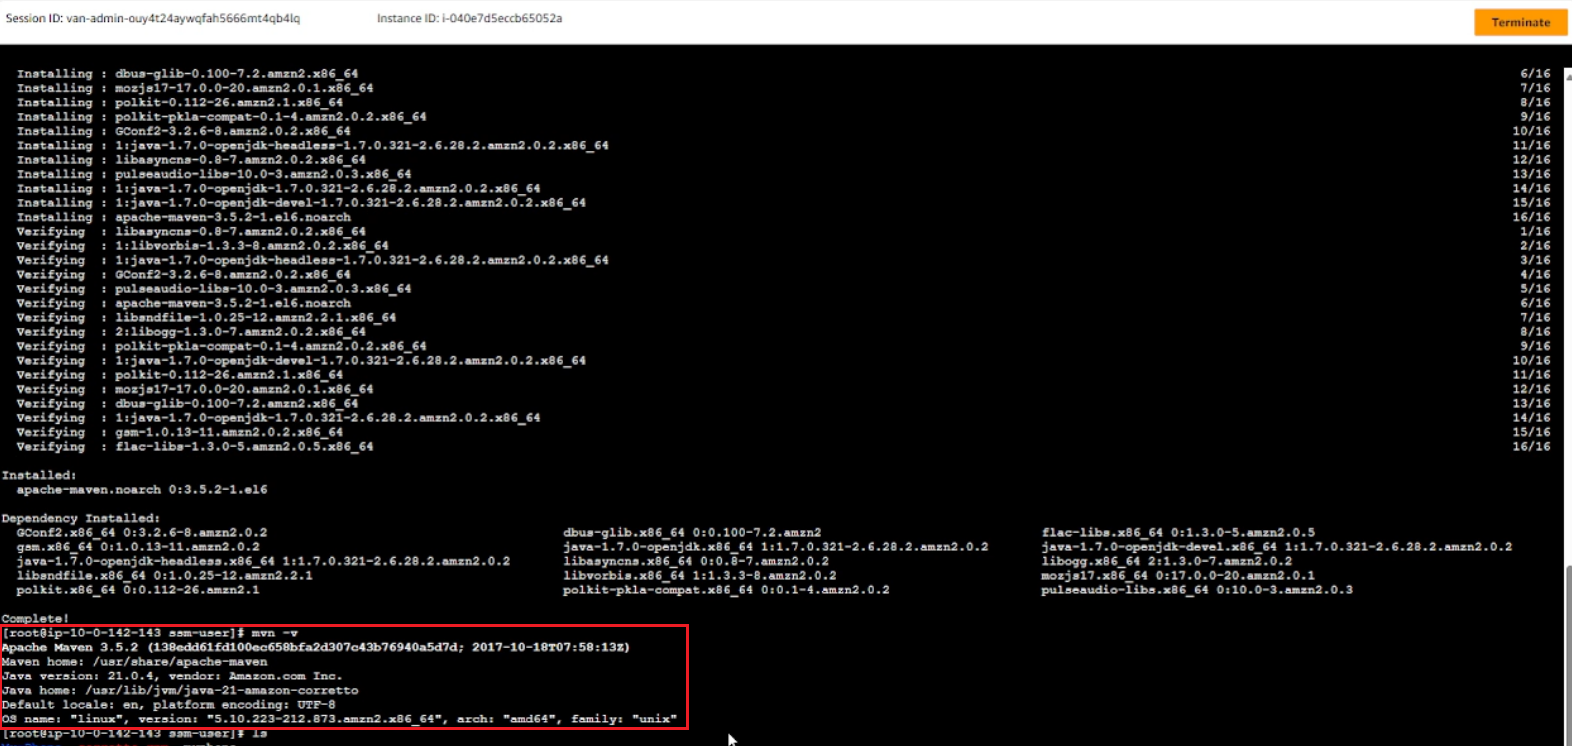
- Install MVN
sudo wget https://repos.fedorapeople.org/repos/dchen/apache-maven/epel-apache-maven.repo -O /etc/yum.repos.d/epel-apache-maven.repo sudo sed -i s/\$releasever/6/g /etc/yum.repos.d/epel-apache-maven.repo
sudo yum install -y apache-maven
mvn -v
Upload project file from computer to EC2 via AWS S3
In this lab, the project is copied from S3 Bucket to EC2 server via Internet Gateway and NAT Gateway, can use VPC Endpoint to increase security, performance and cost when connecting AWS services.
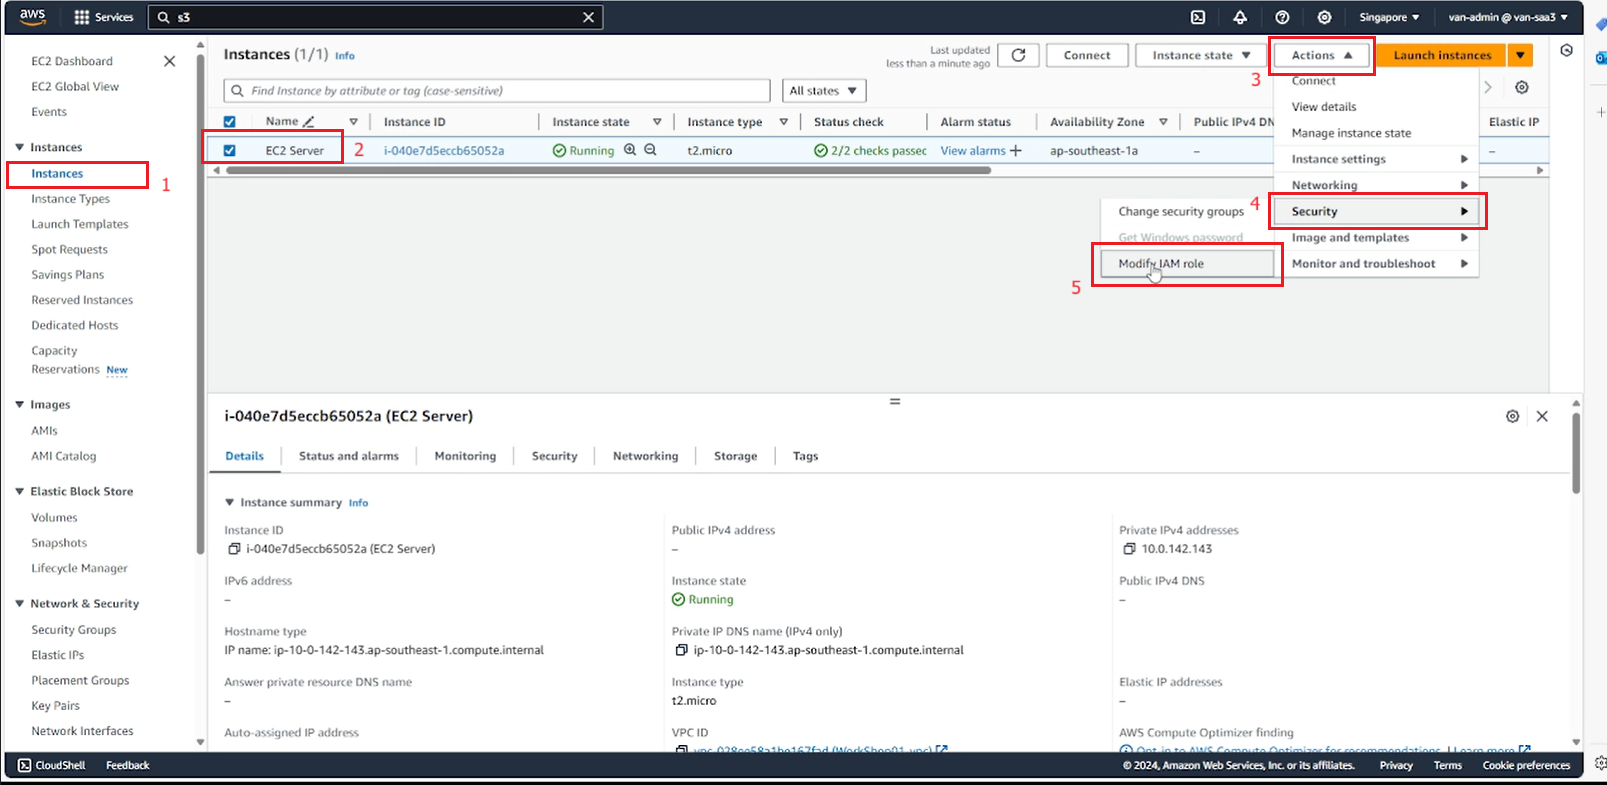
For EC2 to be able to download project file from S3, we need to assign roles to EC2 to be able to access S3.
- On the EC2 service management interface page.
- Select Instances.
- Select EC2 Server.
- Select Action.
- Select Security.
- Select Modify IAM role.
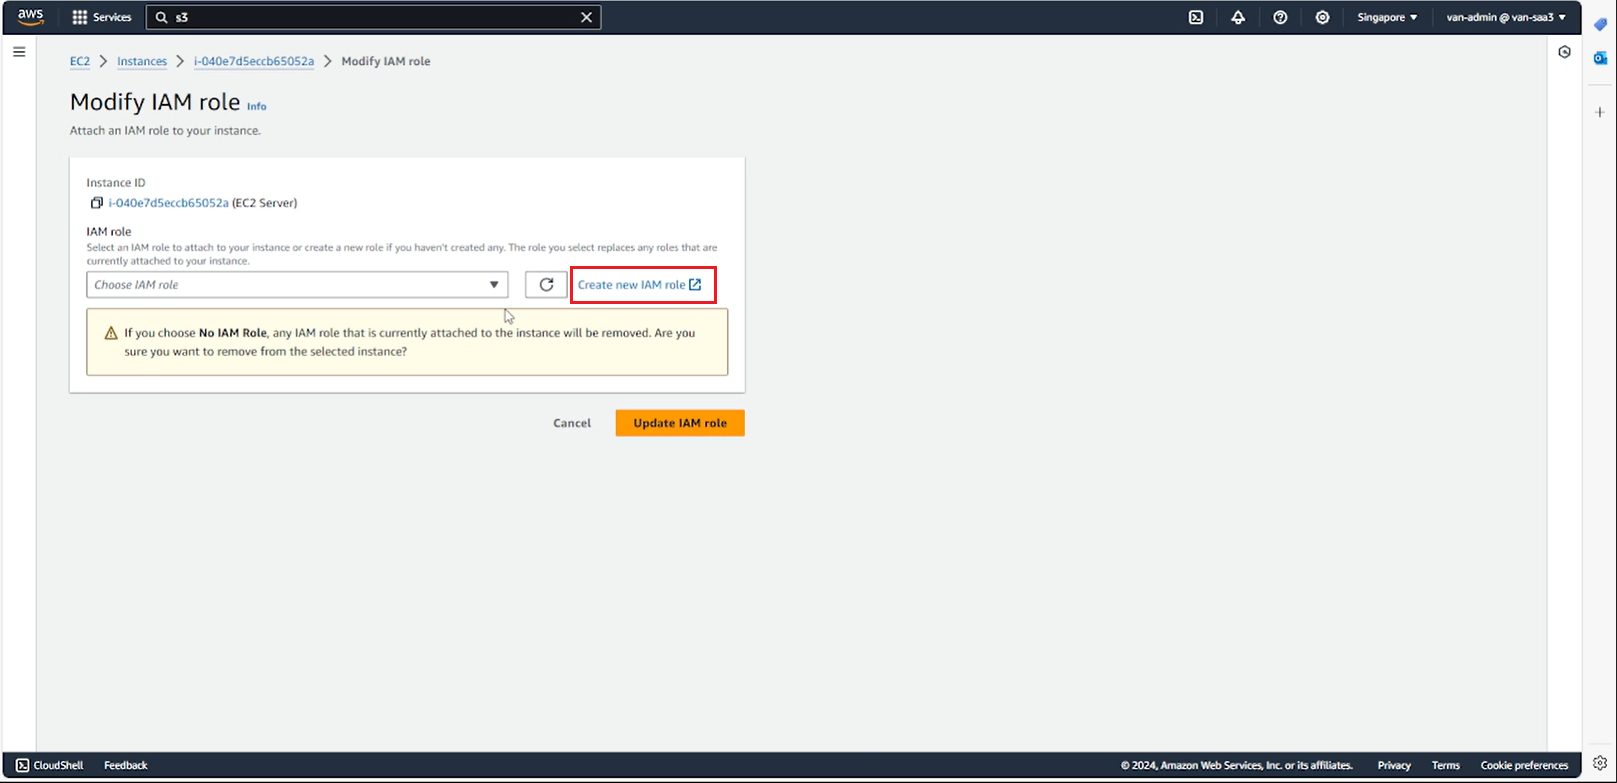
- Create an IAM role
- Select Create new IAM role
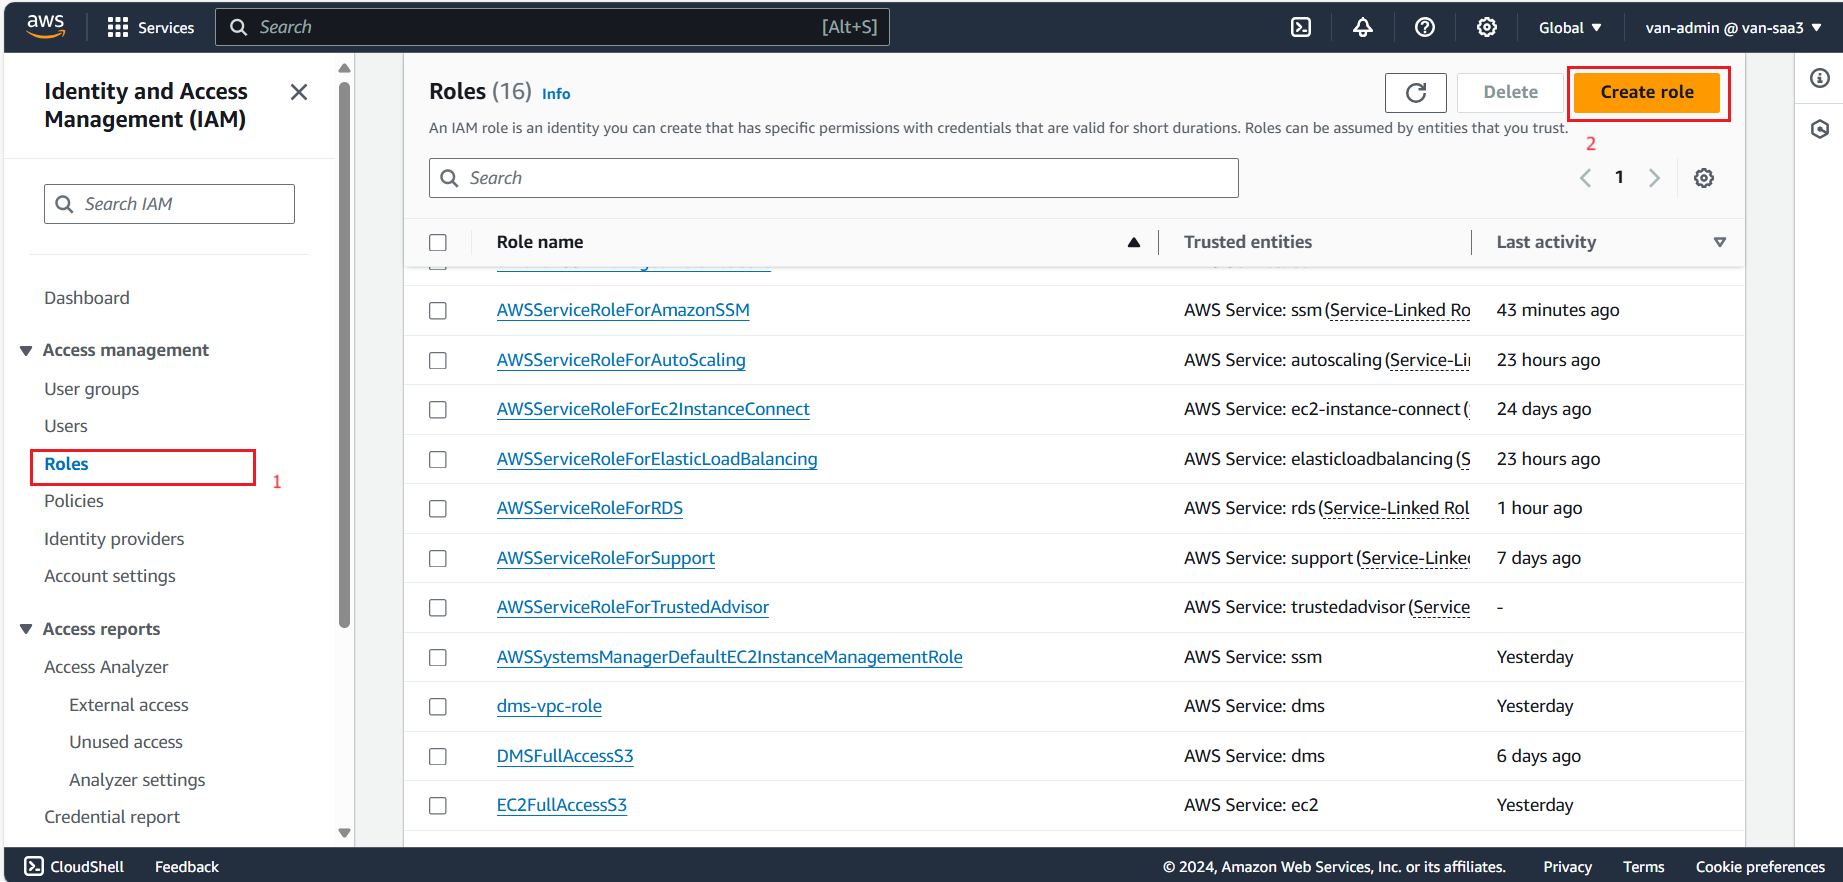
- In the Roles section in Identity and Access Management (IAM) interface, select Cre ate role.
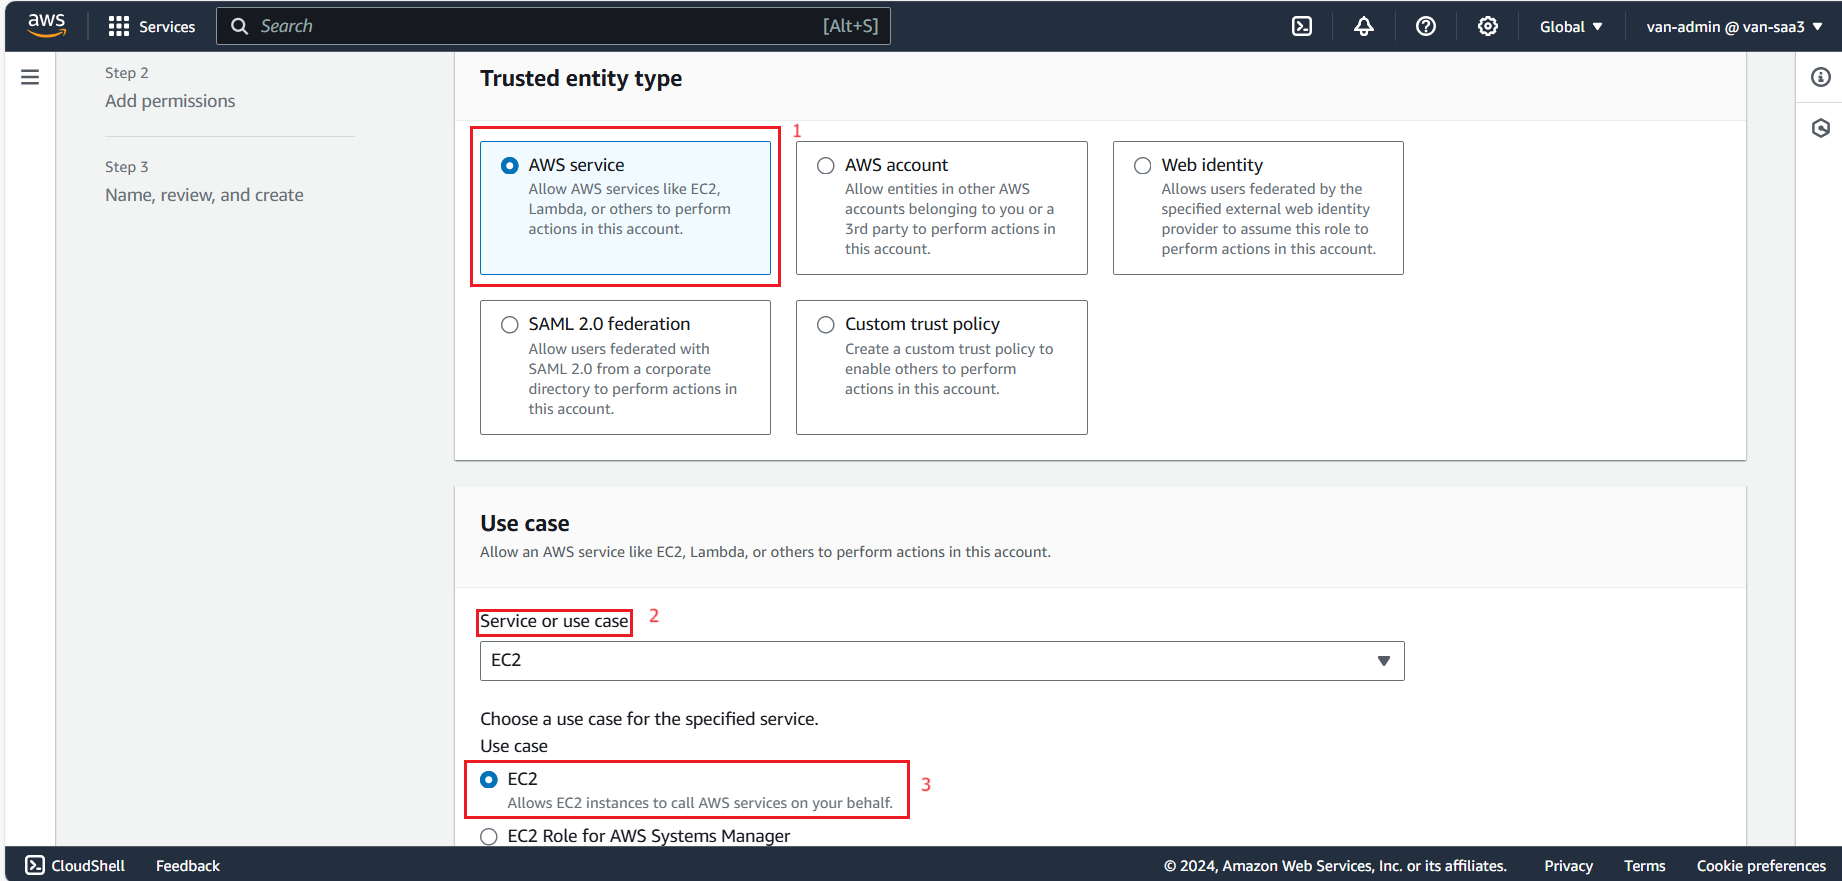
- On the next page select Trusted entity type as AWS service, in Service or use case select EC2.
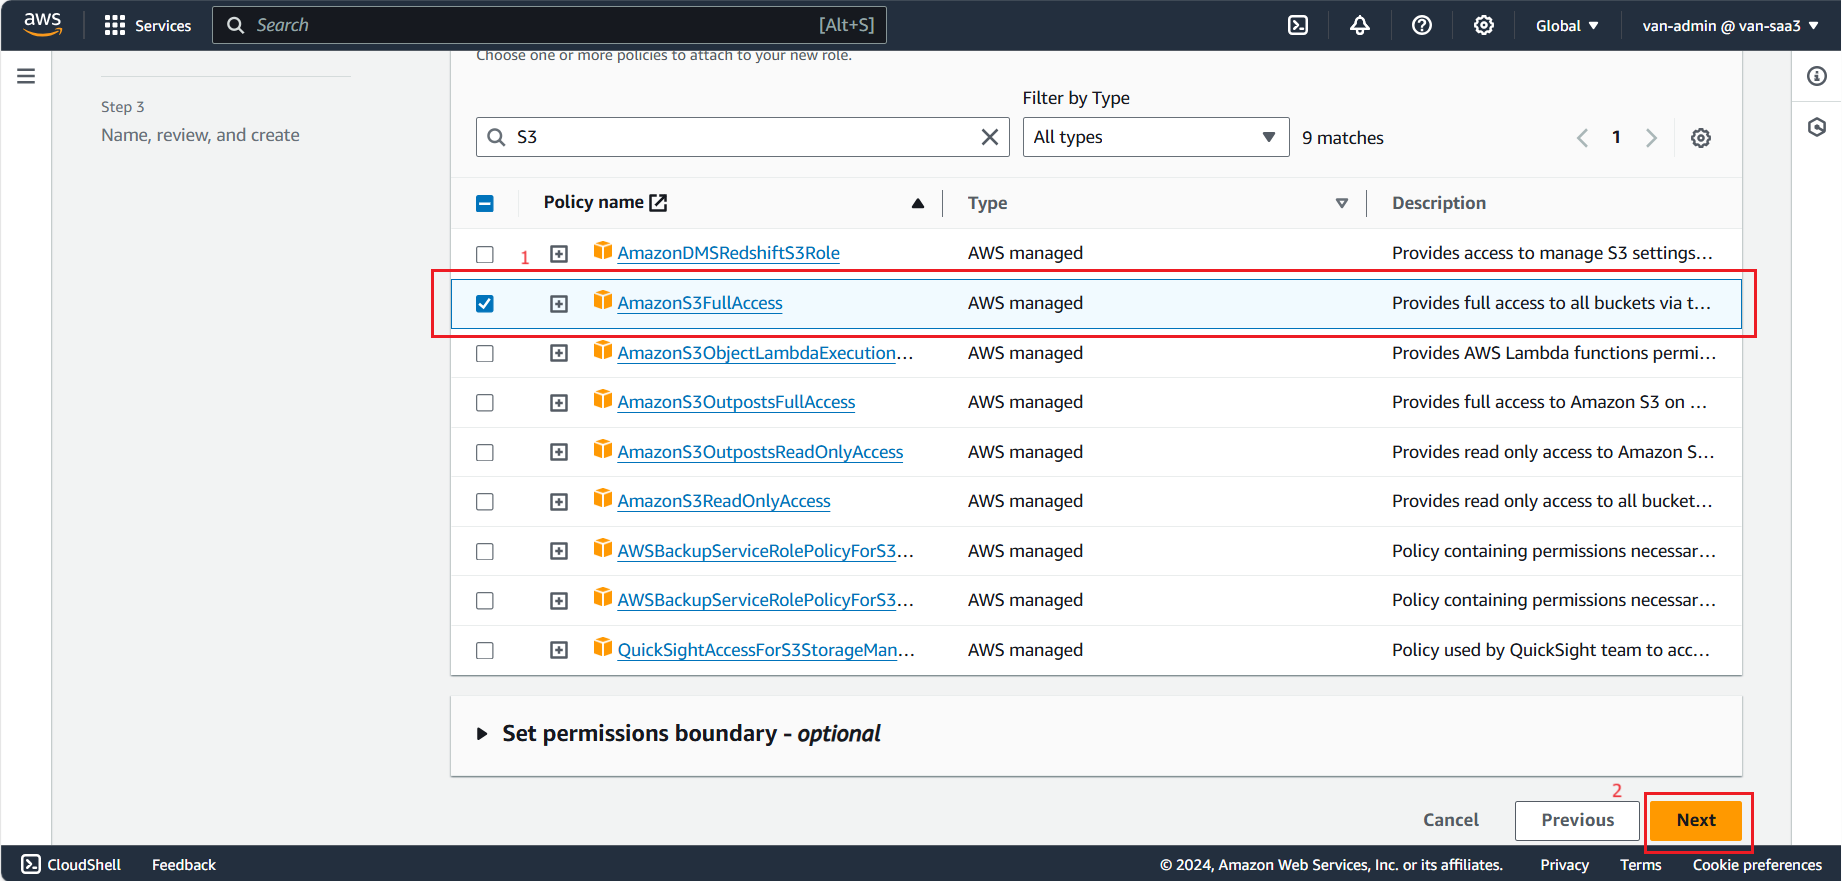
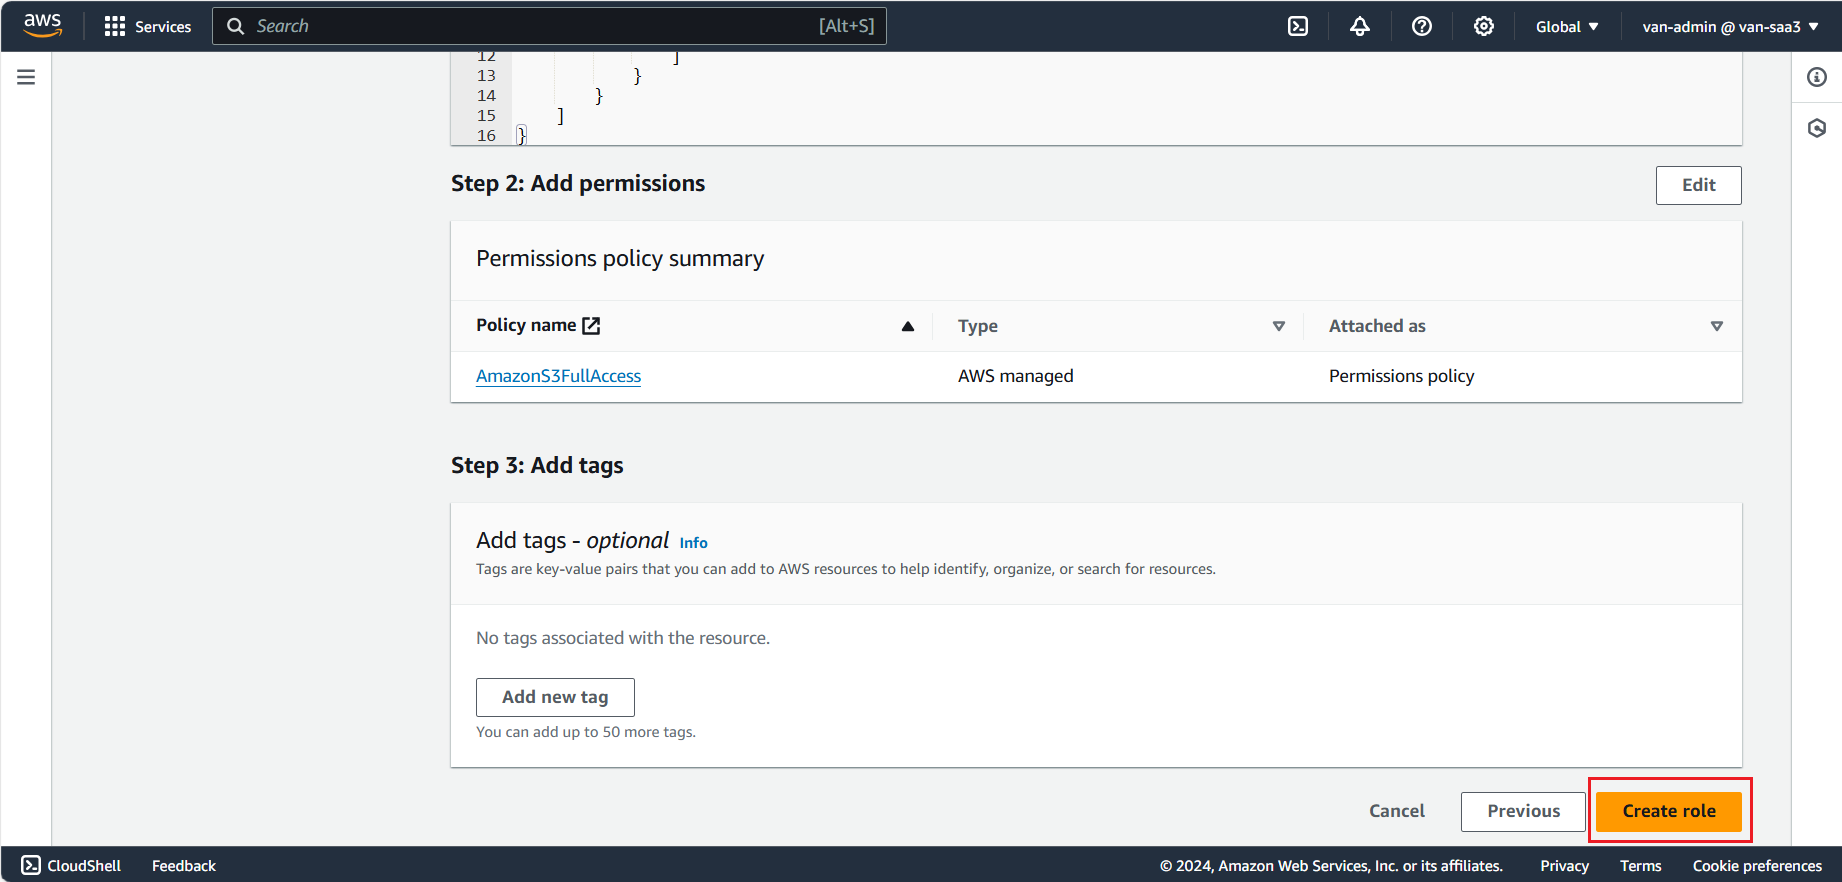
- Next step, select AmazonS3FullAccess permission for EC2, select Next.
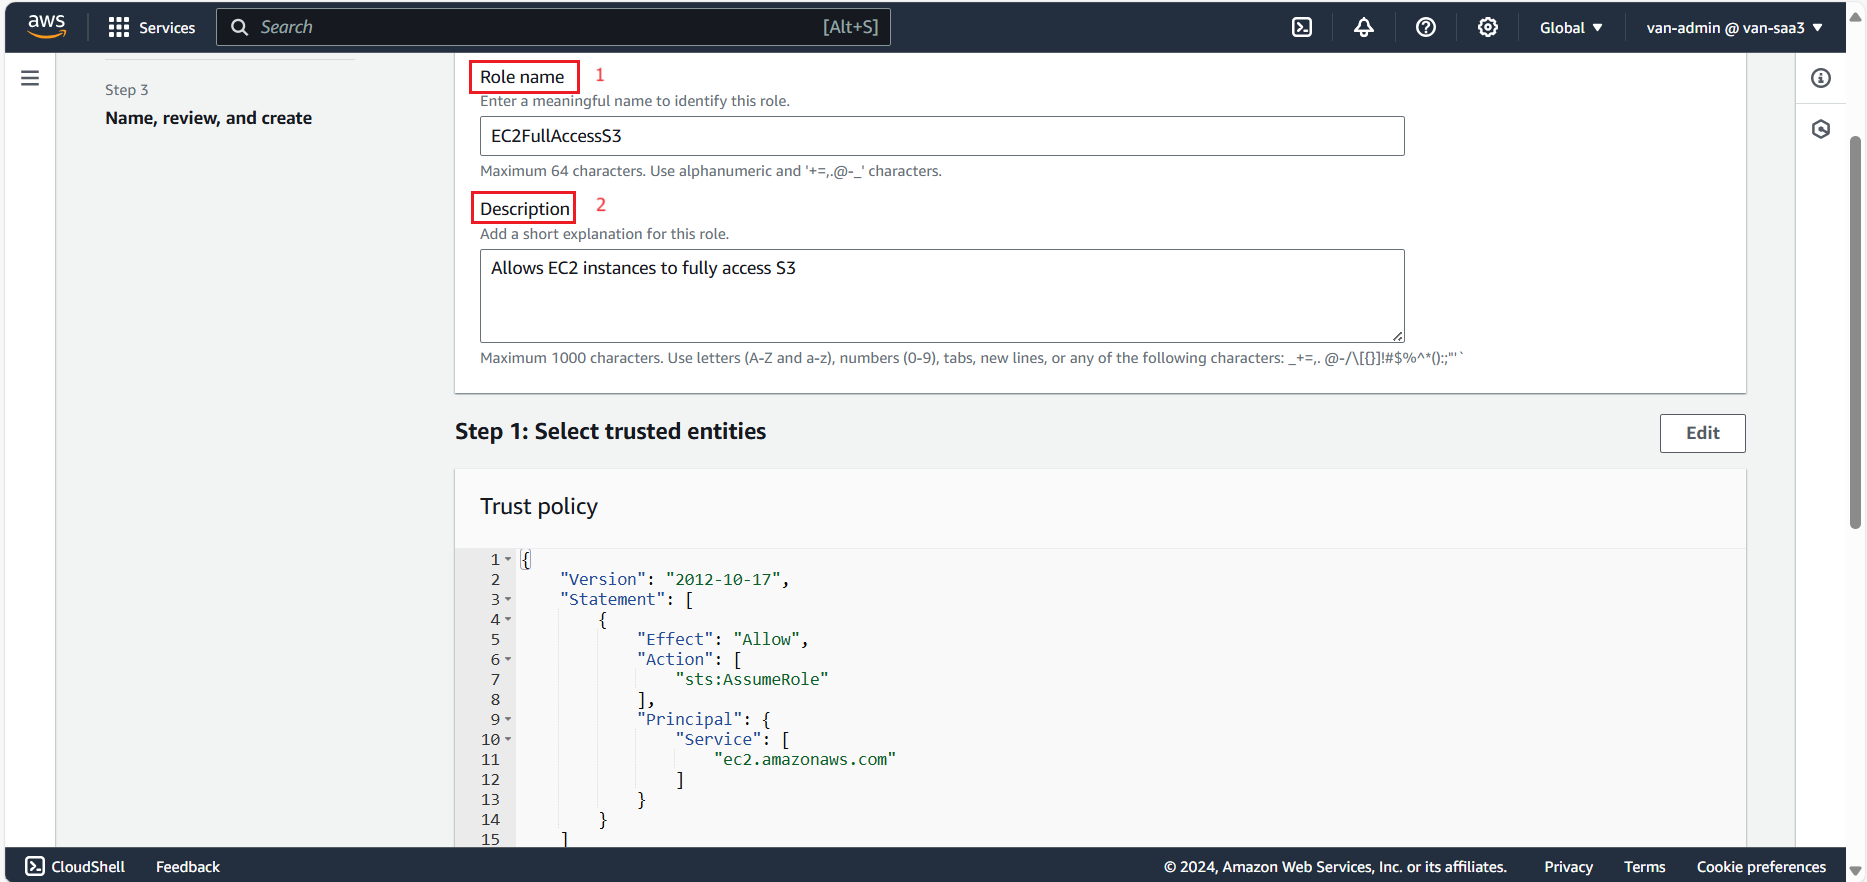
- Fill in Role name, Description, and review the created role, then select Create role.
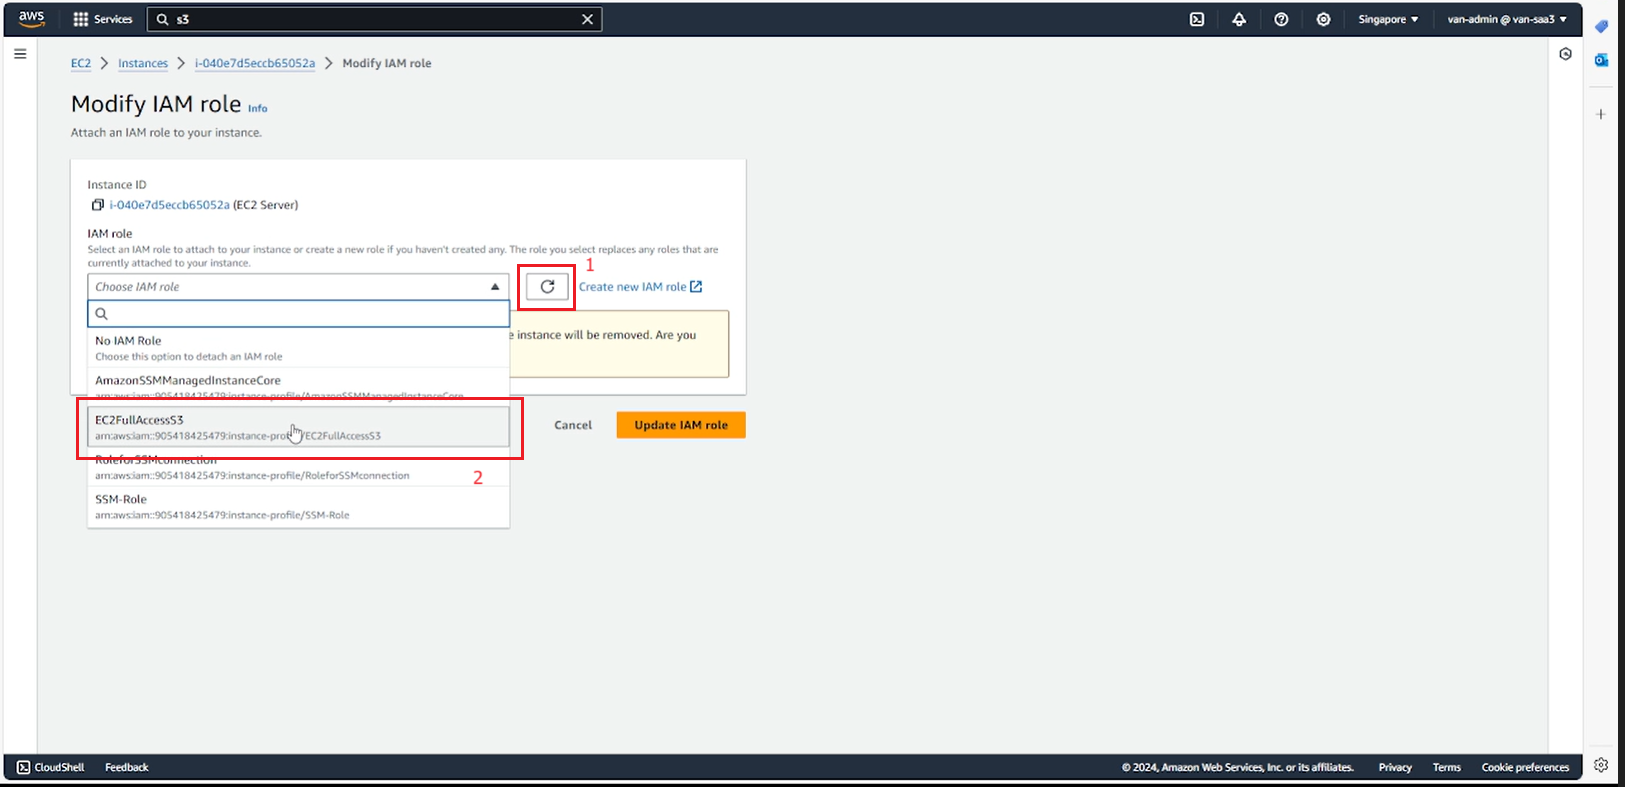
- Assign S3 access to EC2
- Return to the page in step 1, refresh to reload the roles.
- Select the role EC2FullAccessS3.
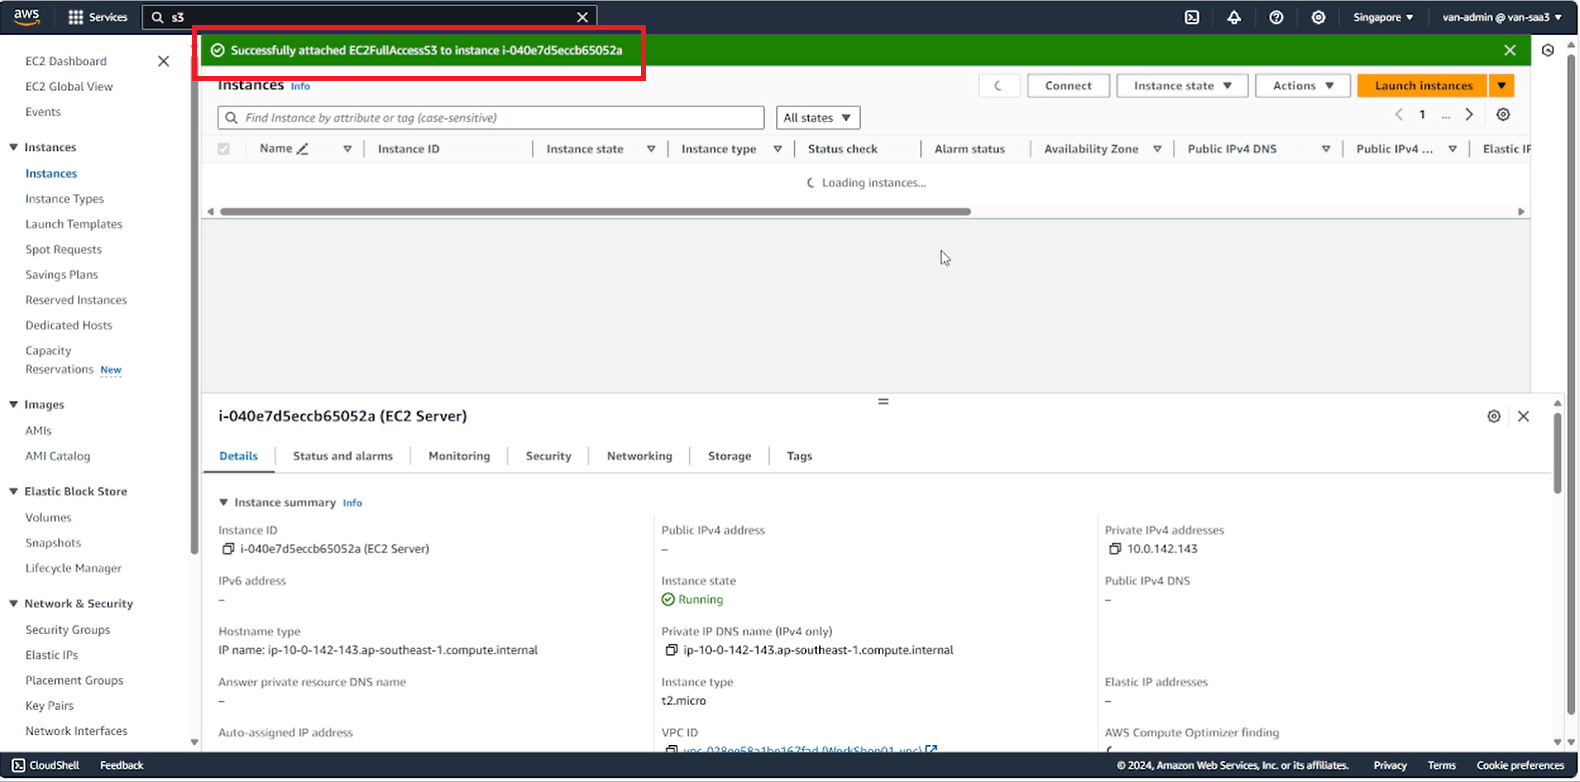
- Select Update IAM role.
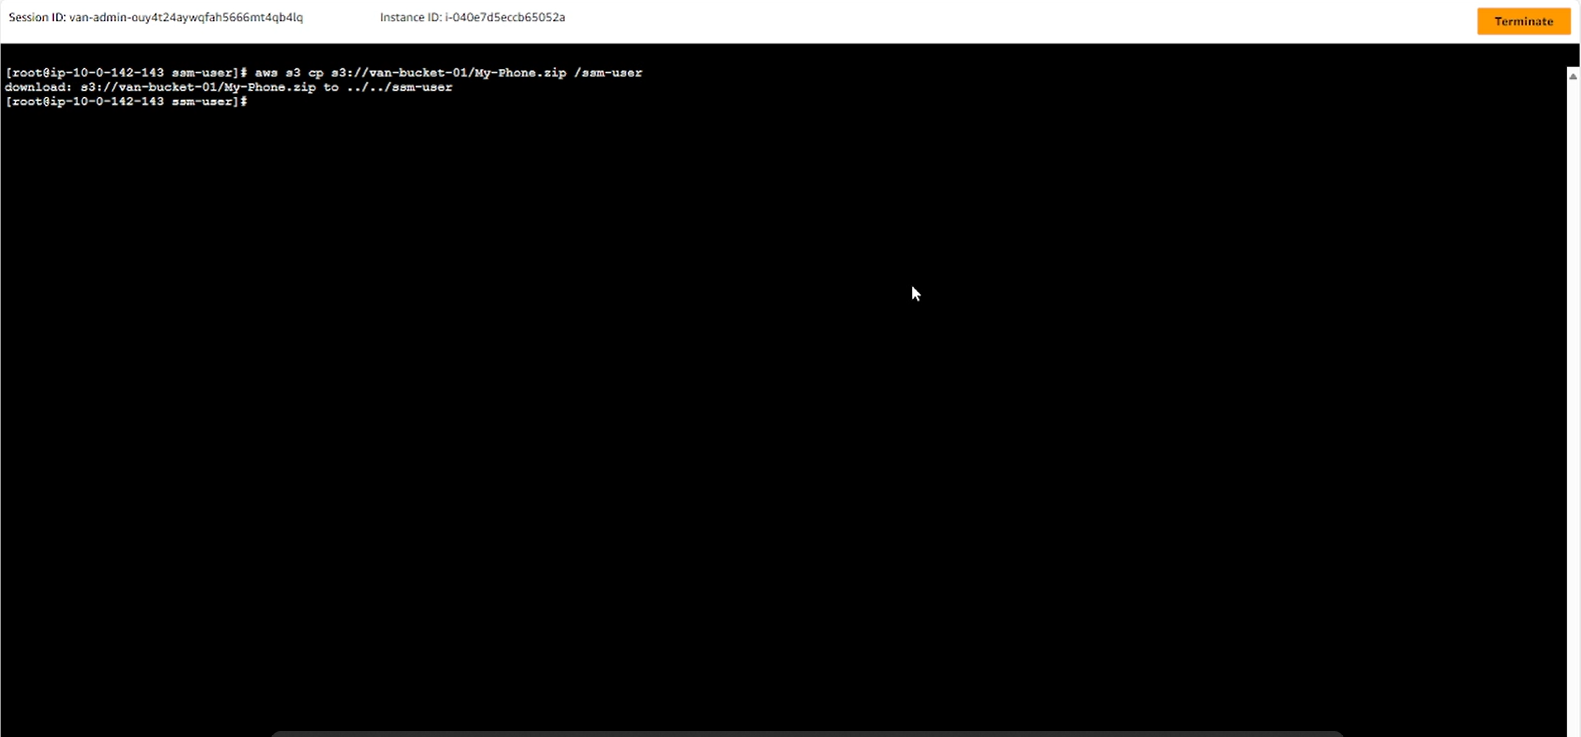
- Copy the project to the server
aws s3 cp s3://van-bucket-01/My-Phone.zip /ssm-user
If EC2 has not been assigned S3 access rights, an error fatal error: Unable to locate credentials will appear.
Deploy the application to EC2
- Unzip the file
unzip myphone

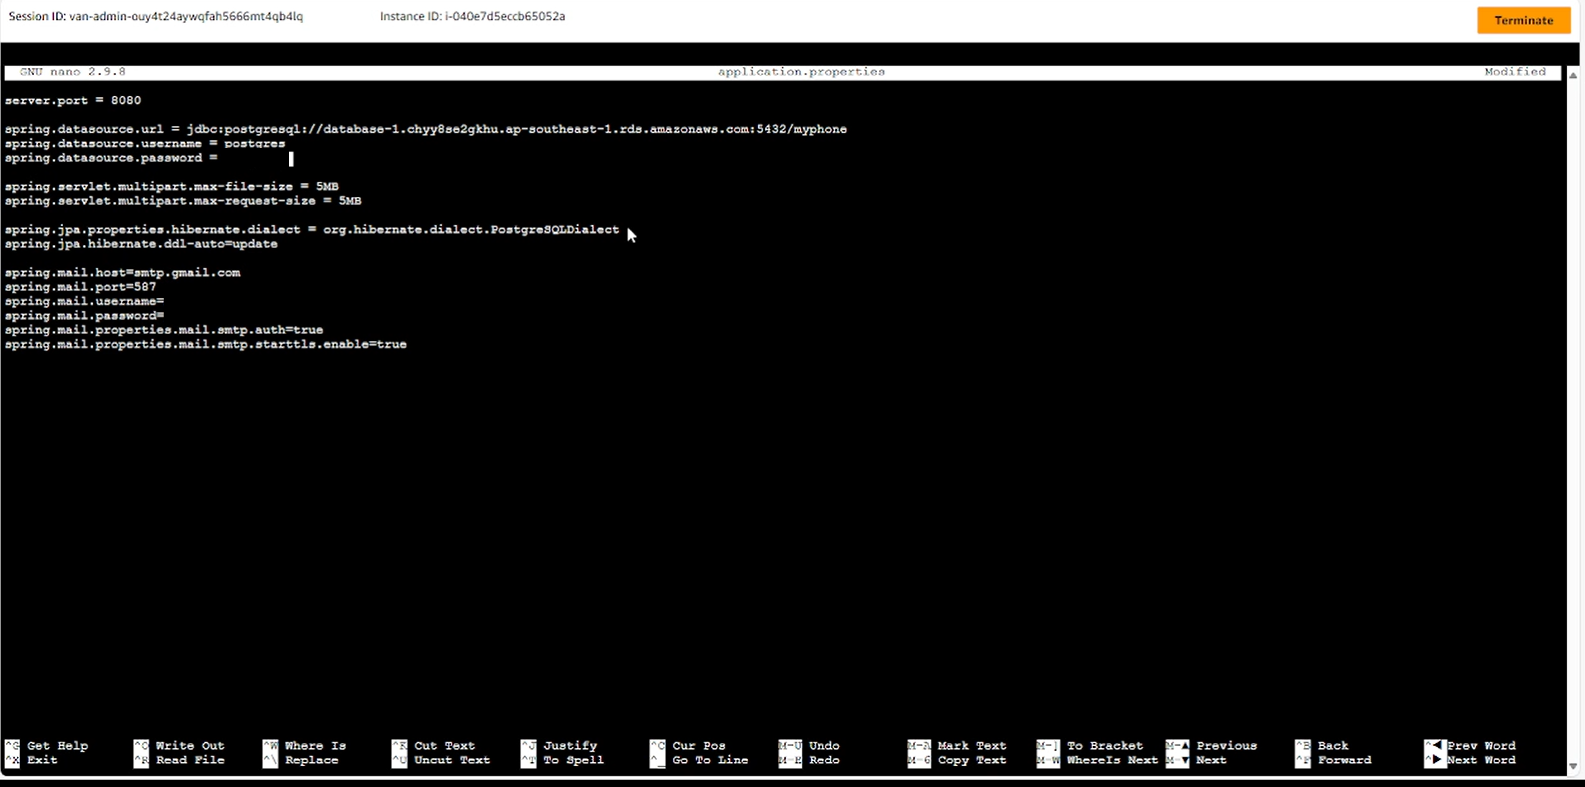
- Reconfigure the connection file to the database
- Access the project configuration file
nano application.properties
- Edit url, username, password corresponding to the created RDS, then save the file.
- Run the project
mvn spring-boot: run
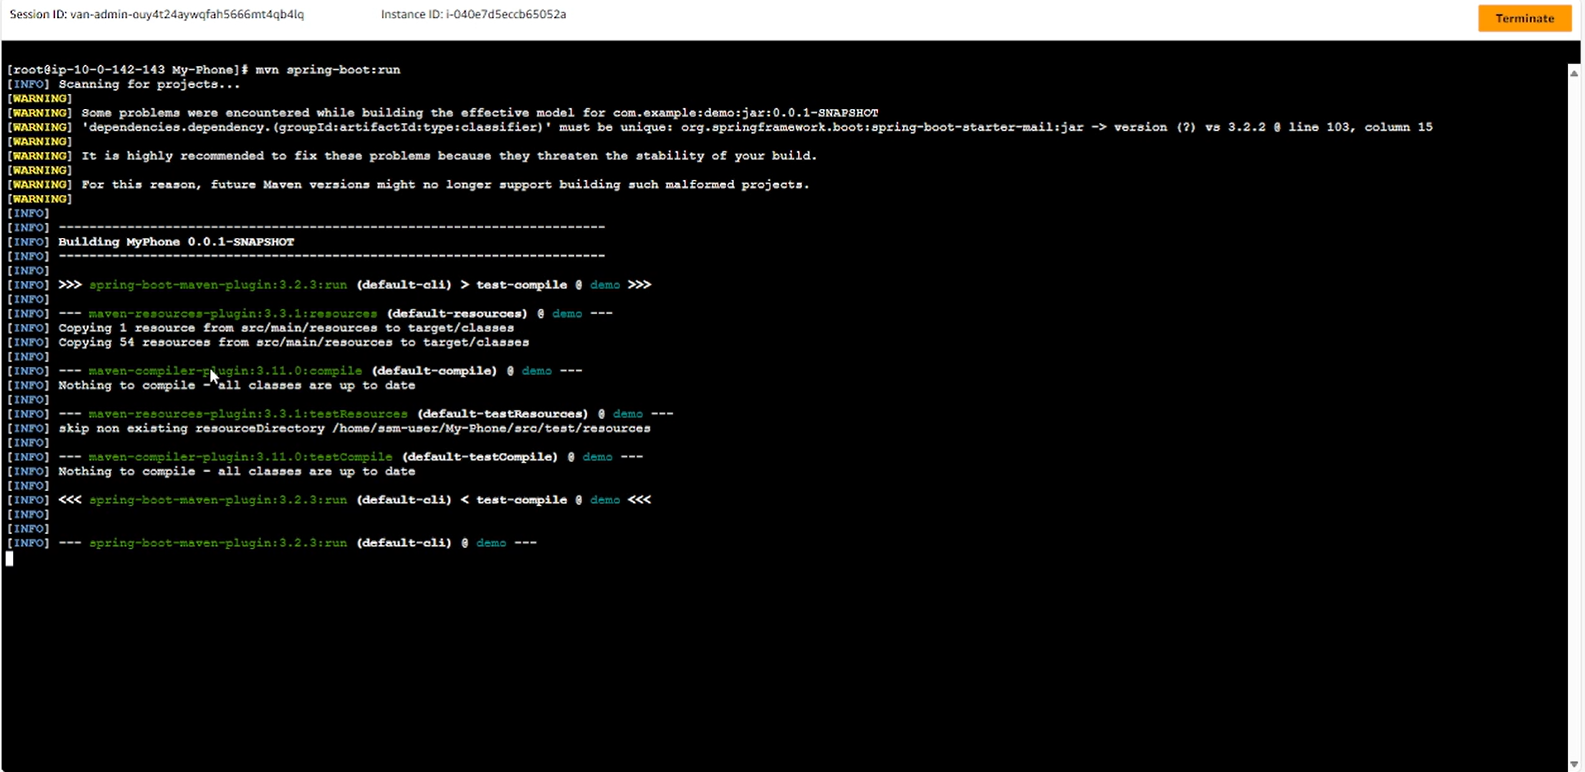
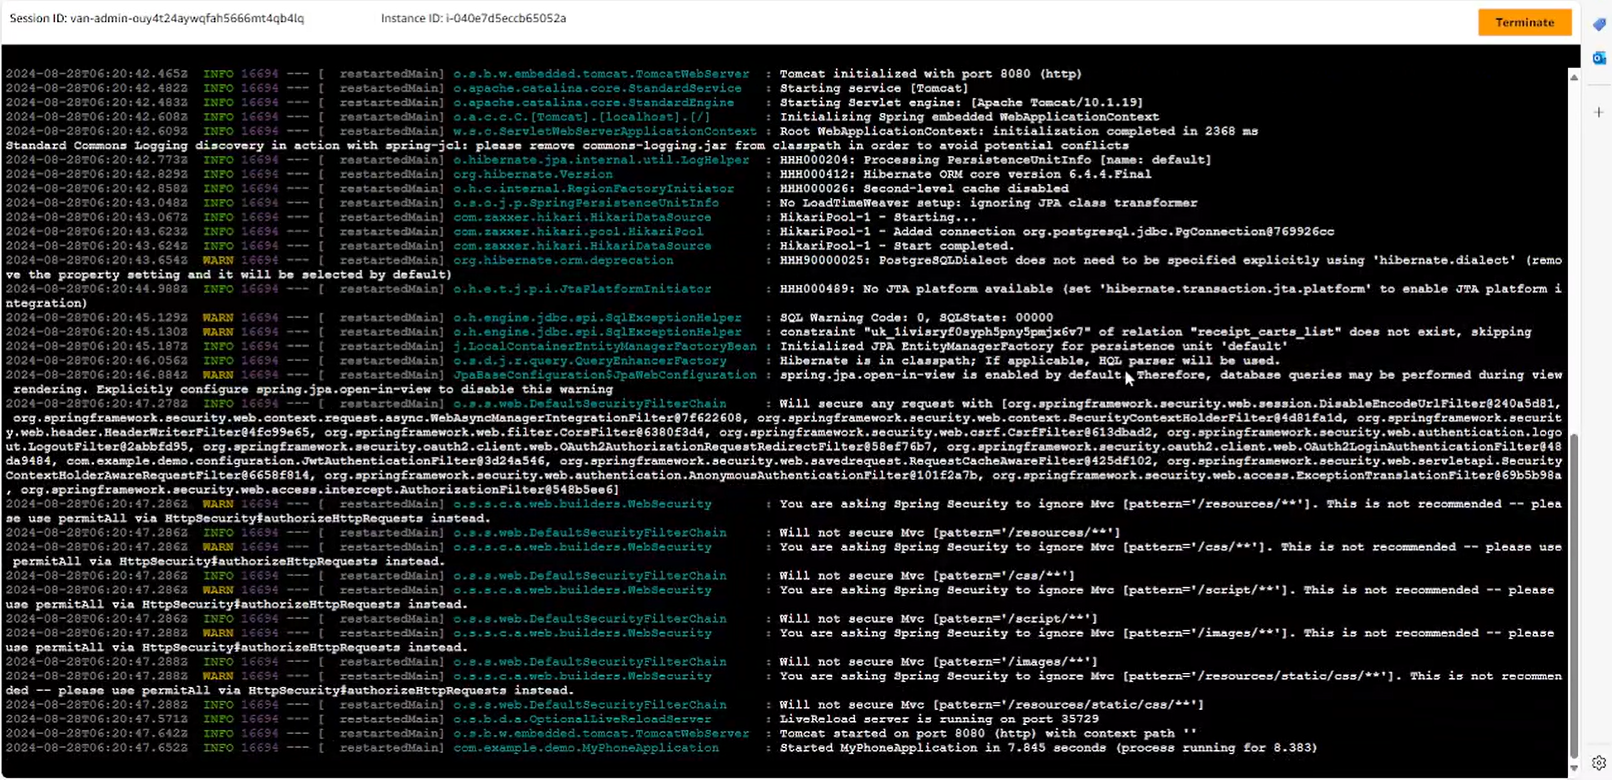
- The project has run successfully on EC2.
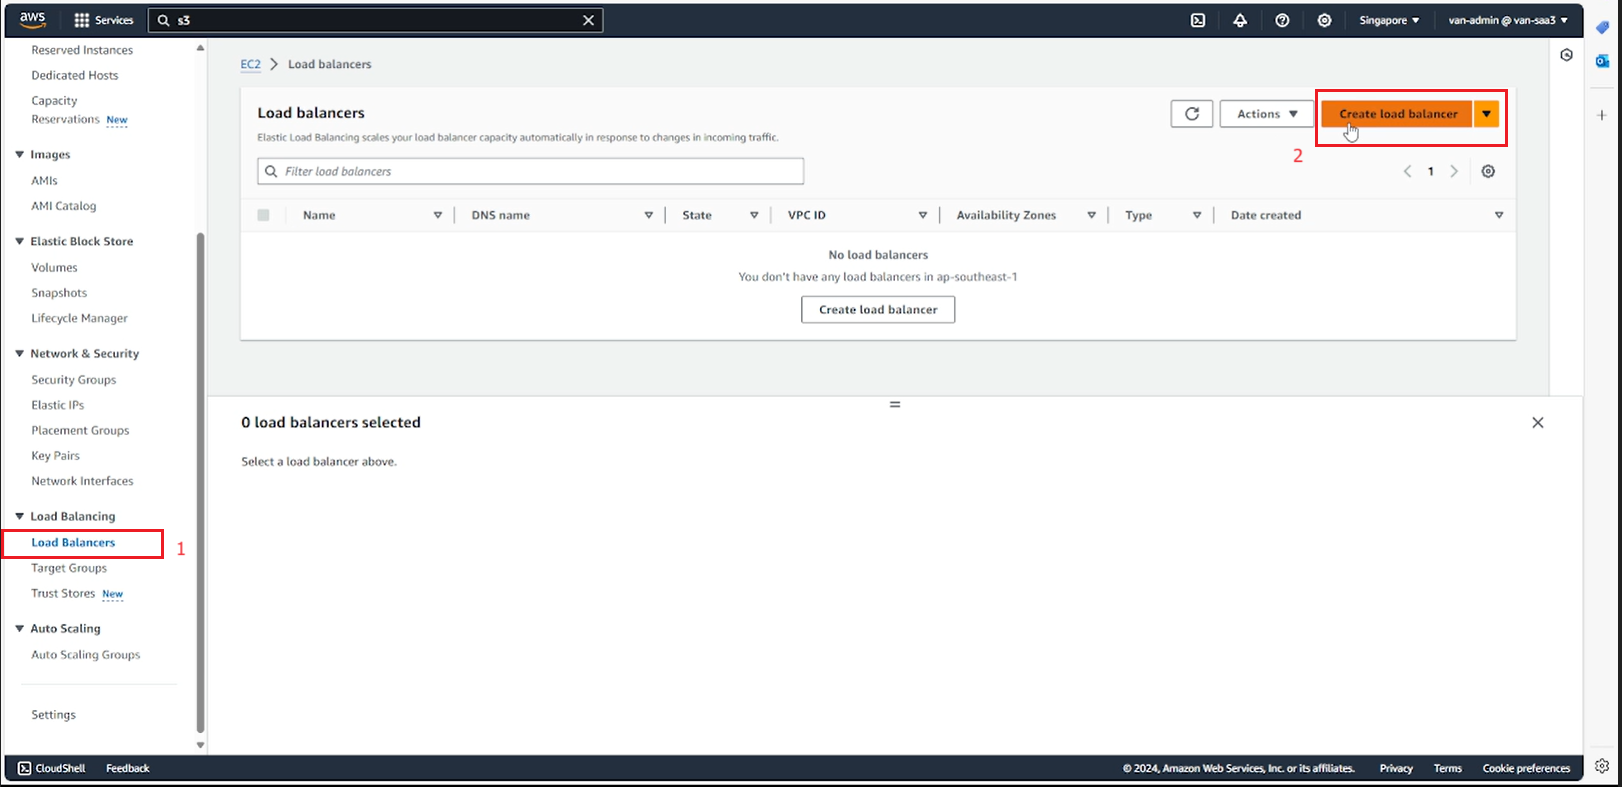
- Create Application Load Balancer
- On the EC2 service management interface page, select Load Balancers.
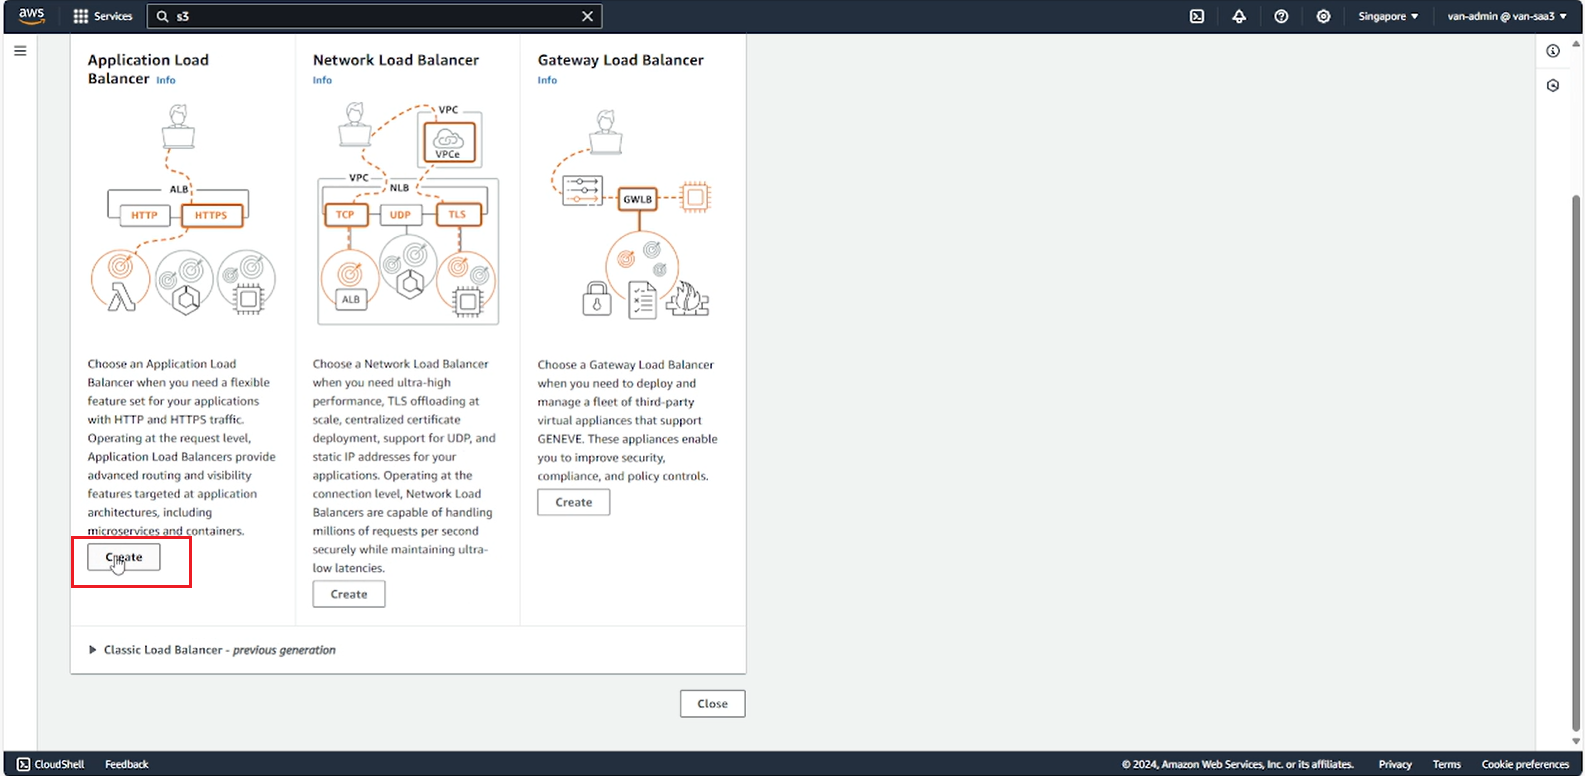
- Select Create load balancer.
- Select Create Application Load Balancer.
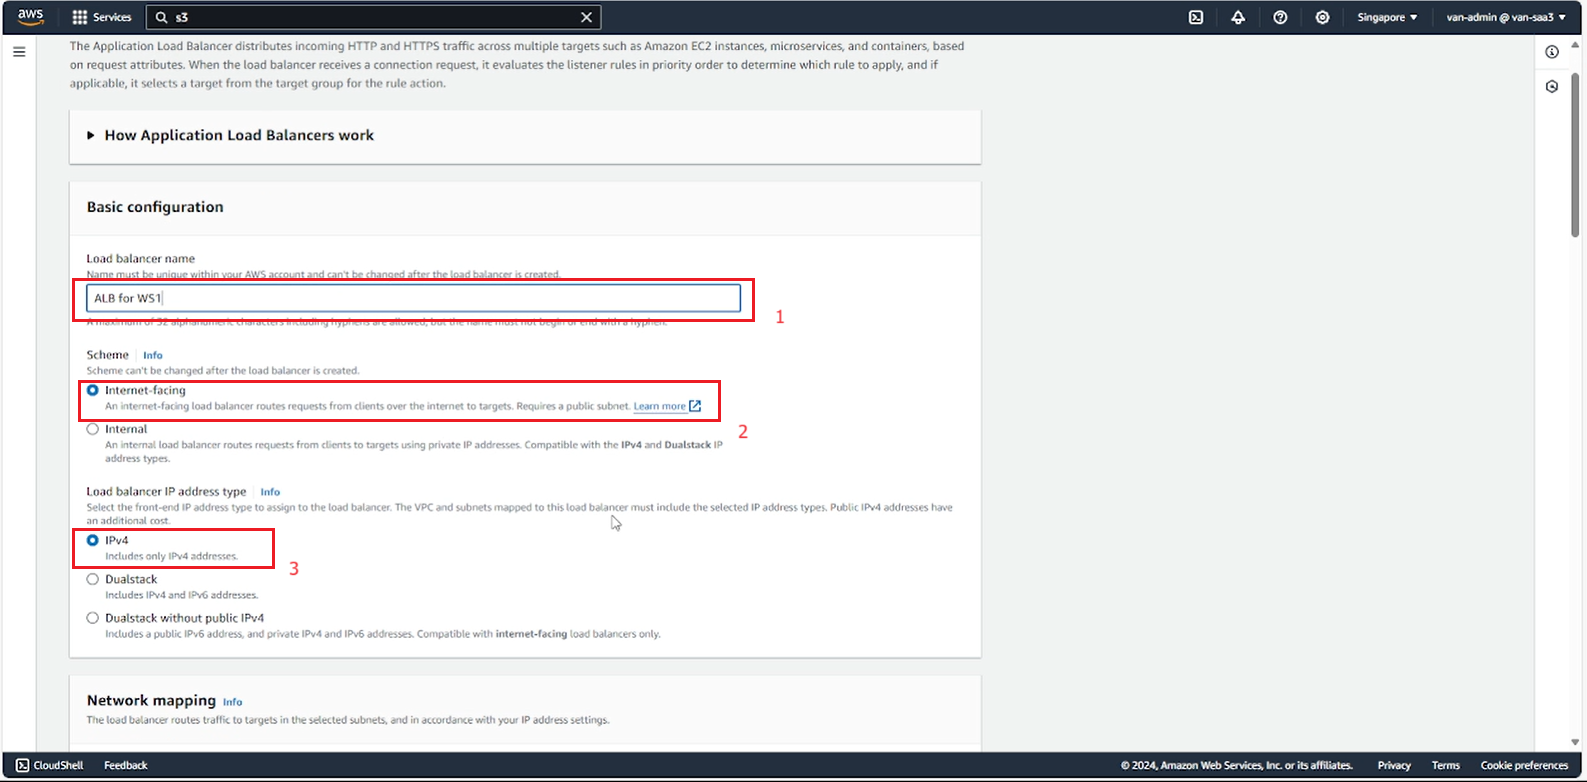
- Fill in the ALB name, select Scheme Internet-facing to be able to connect to the running website, select Load banlancer IP address type IPv4.
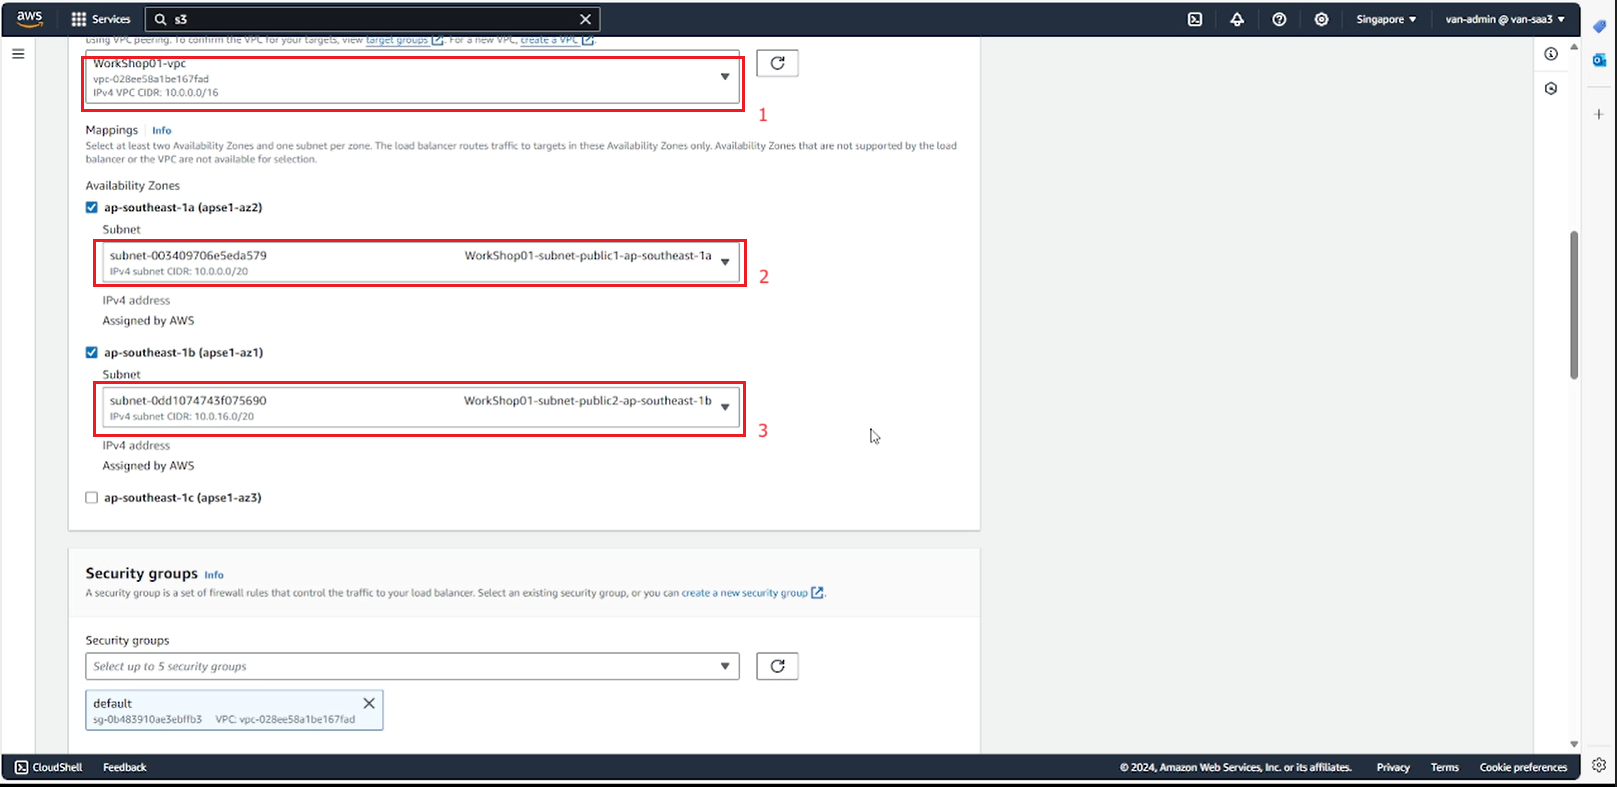
- In the Network mapping section, select the created VPC and 2 public subnets in 2 AZs inside the VPC to connect to the ALB.
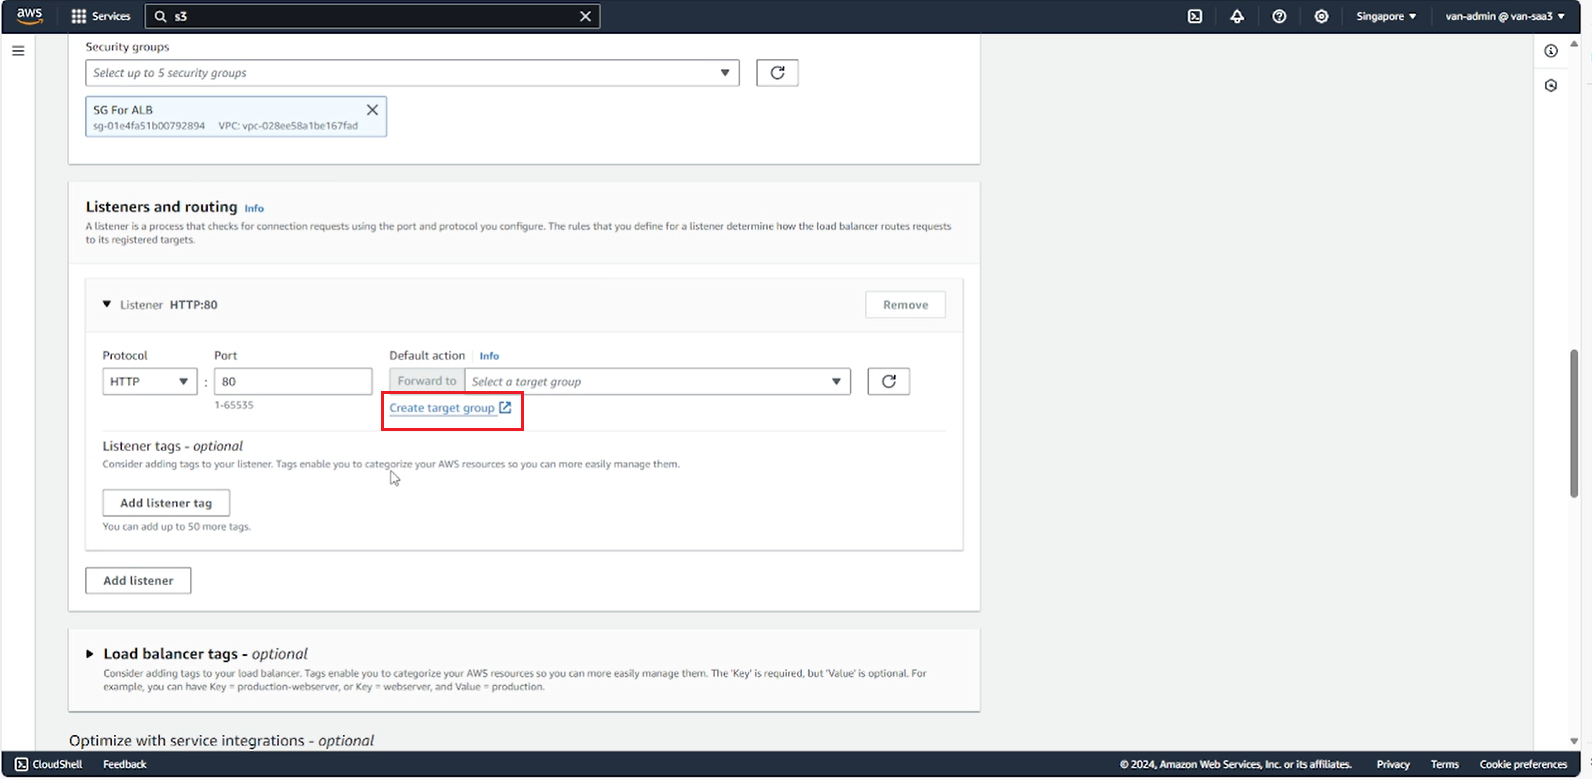
- Select the Security group created for ALB.
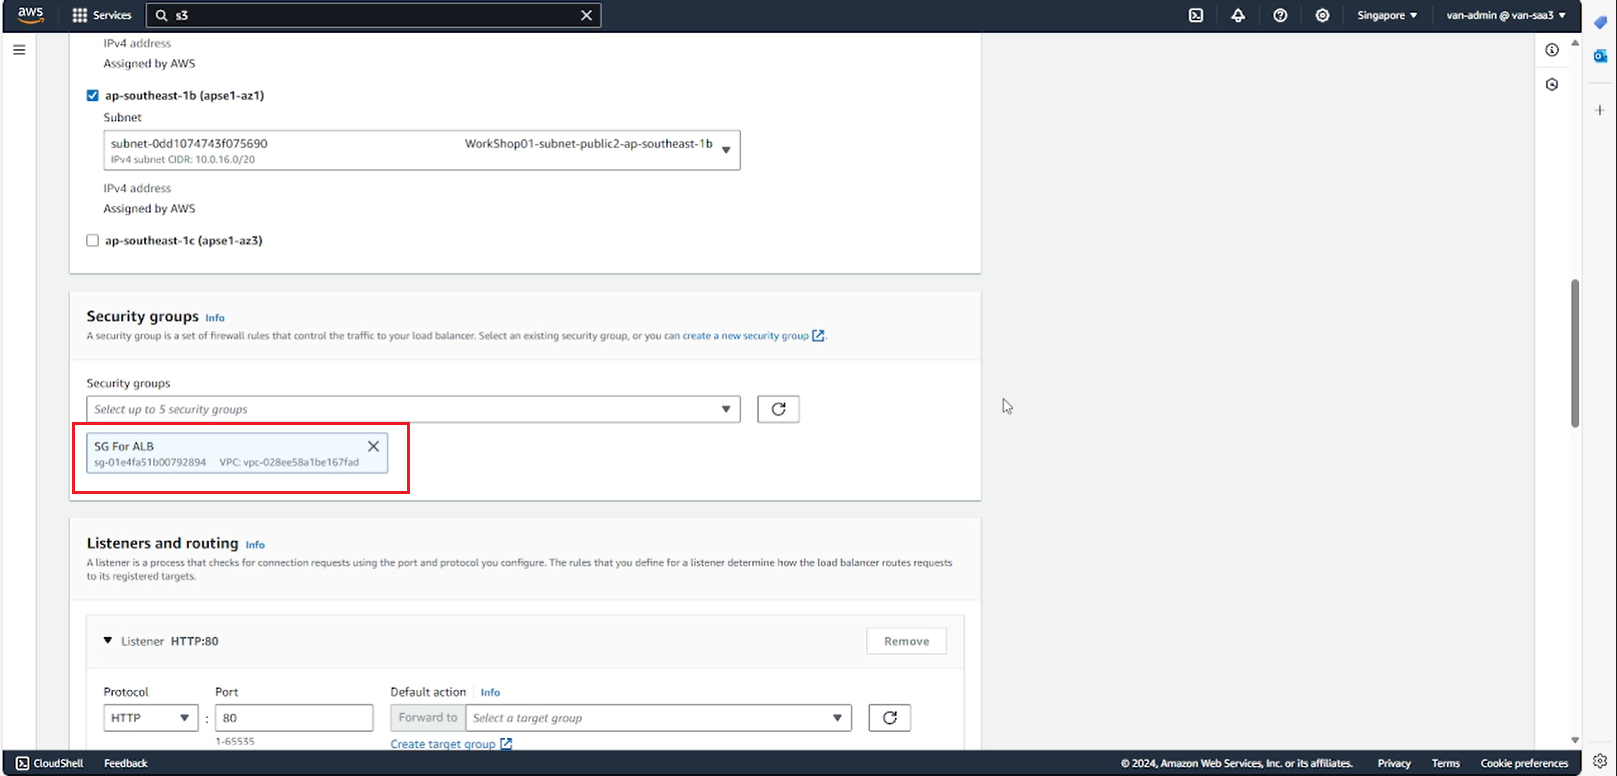
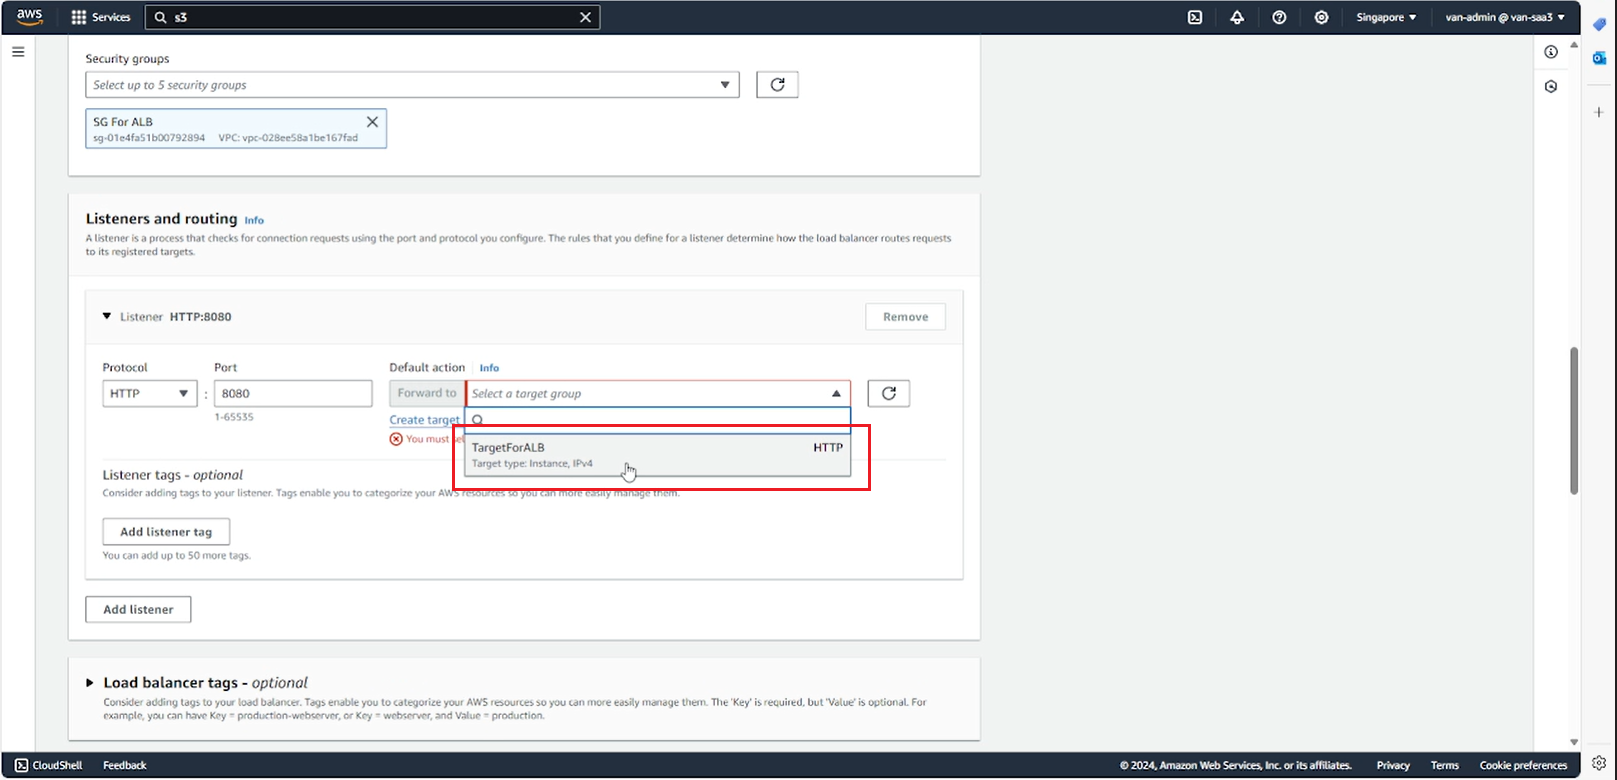
- In the Listeners and routing section, select Create target group to create a Target group for ALB.
- Select the target type Instance and enter the Target group name.

- Select Protocal:Port, IP address type, Heal check, then select Next
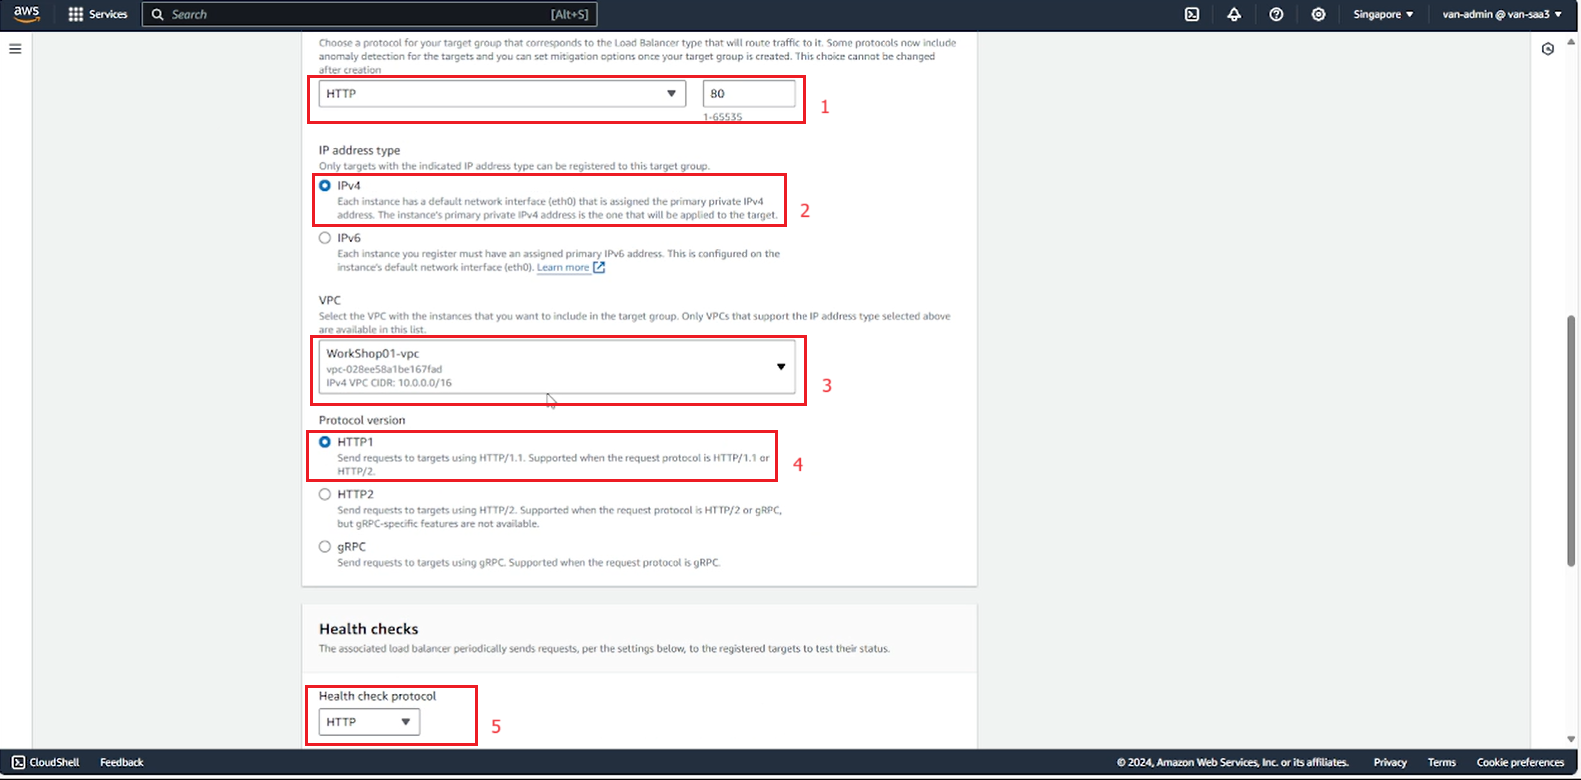
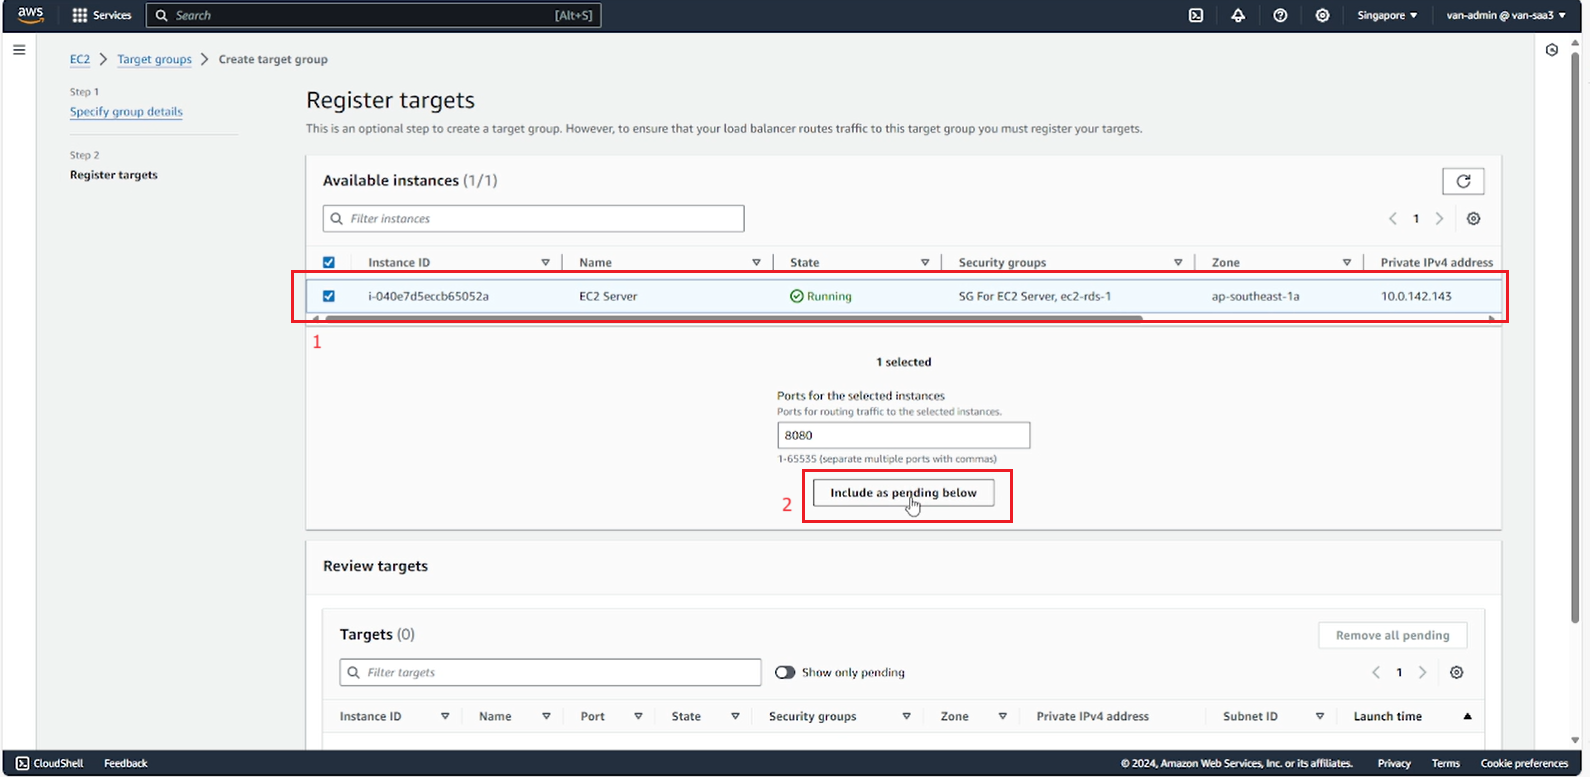
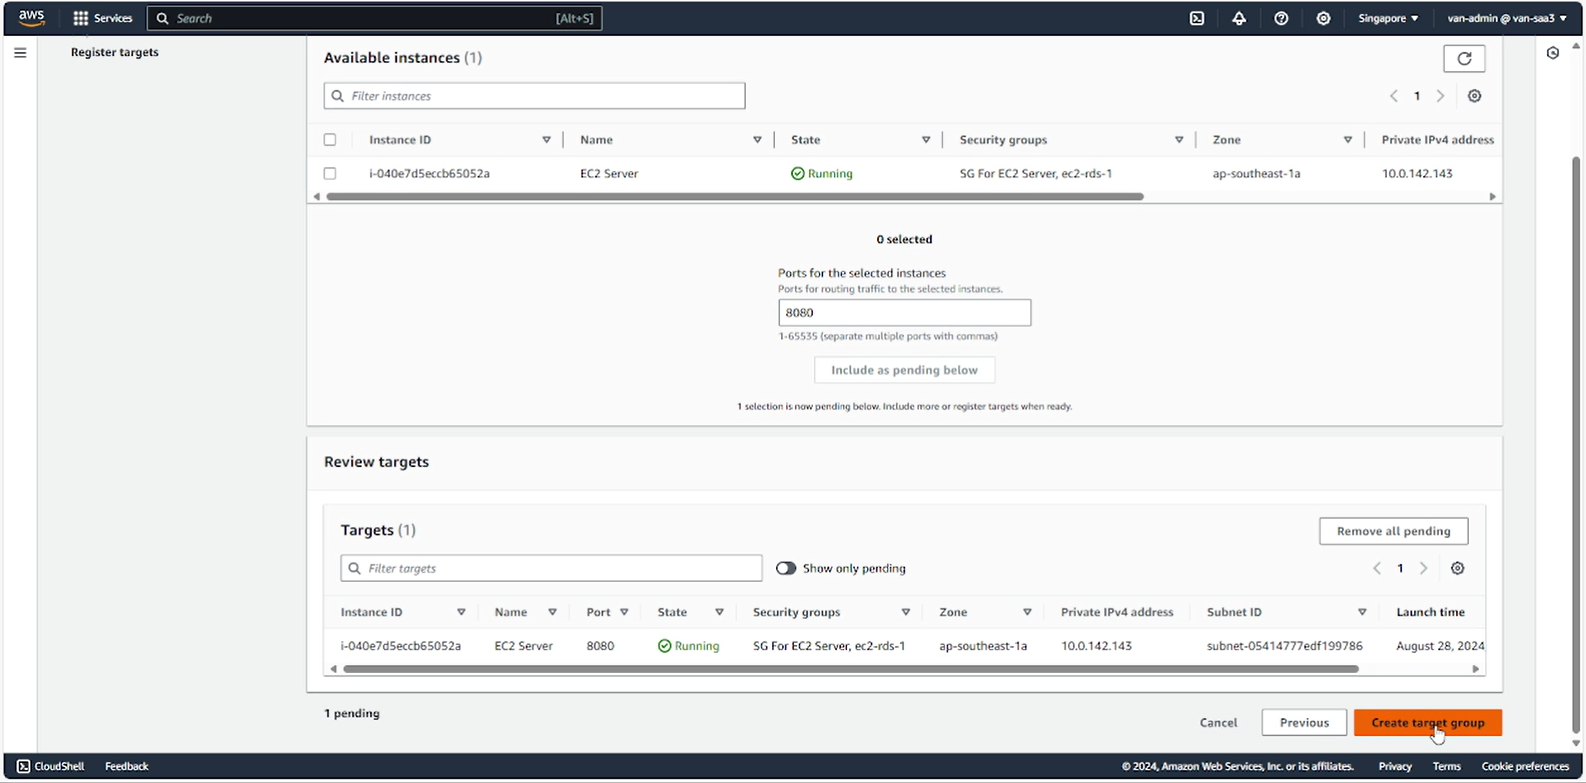
- Add the running instance to the target group, then select Create target group.
- Return to the ALB creation page, refresh and select the target group you just created.
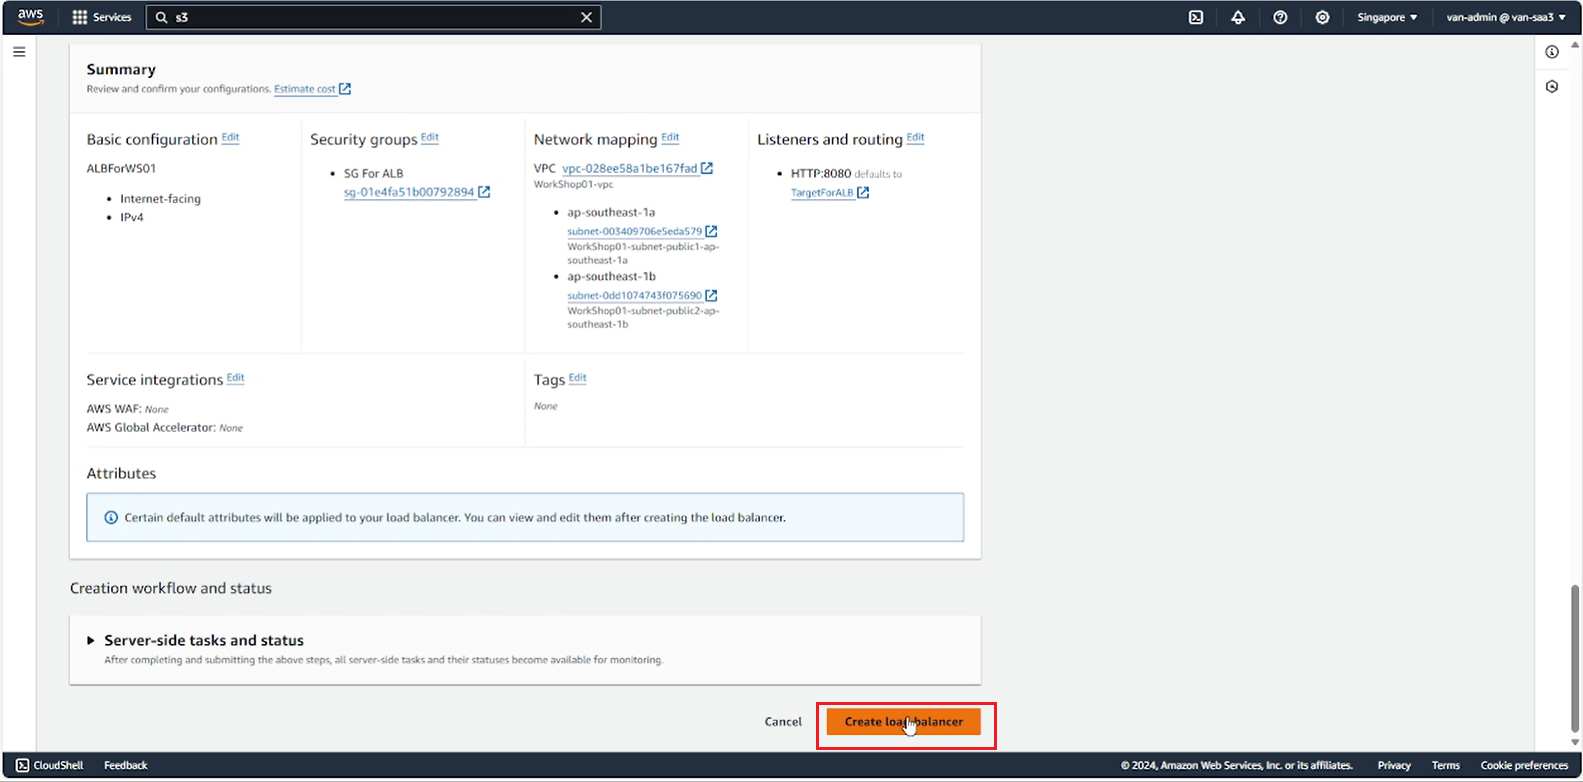
- Review the options again and select Create load balancer.
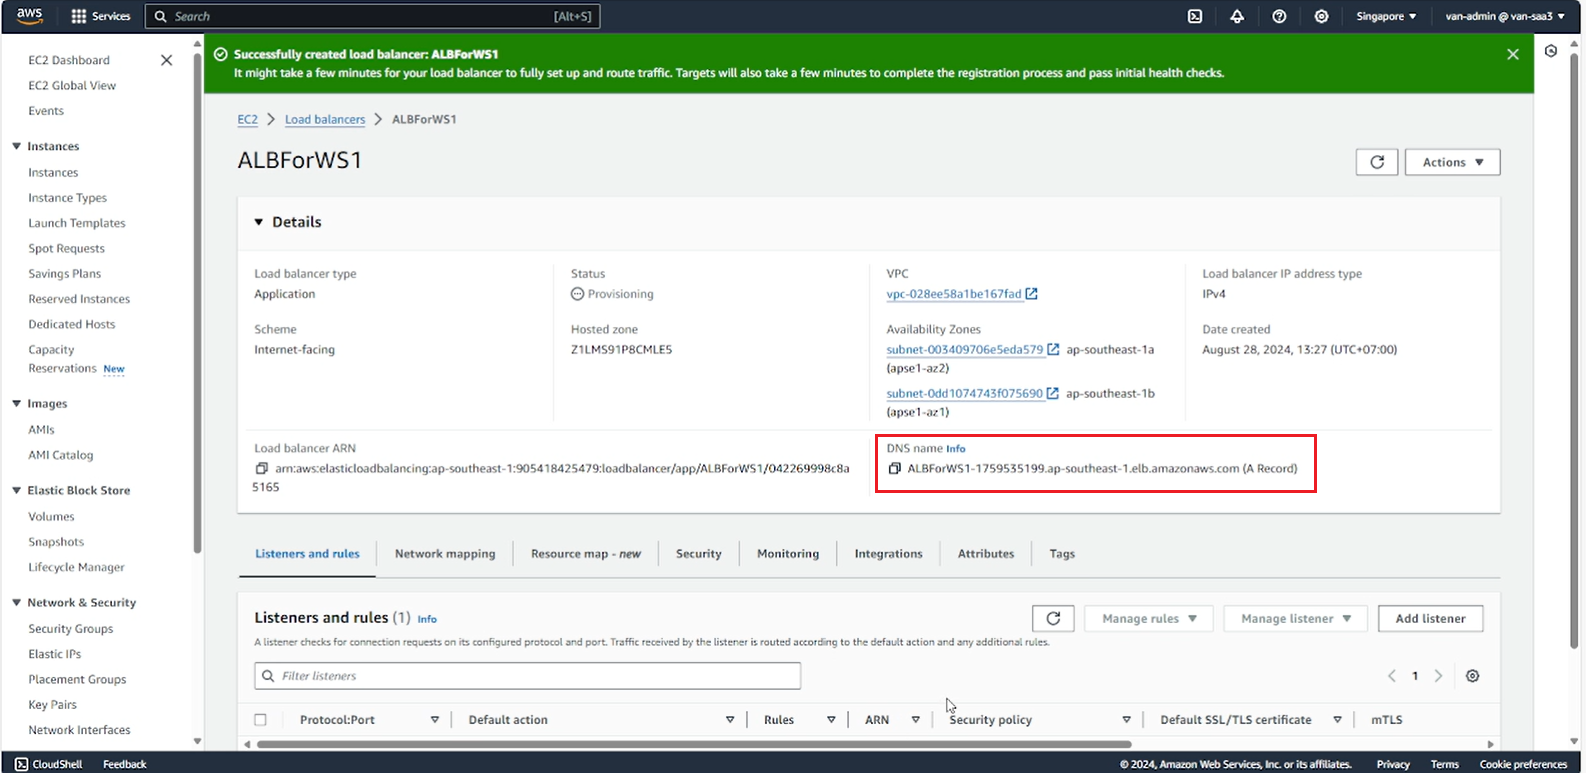
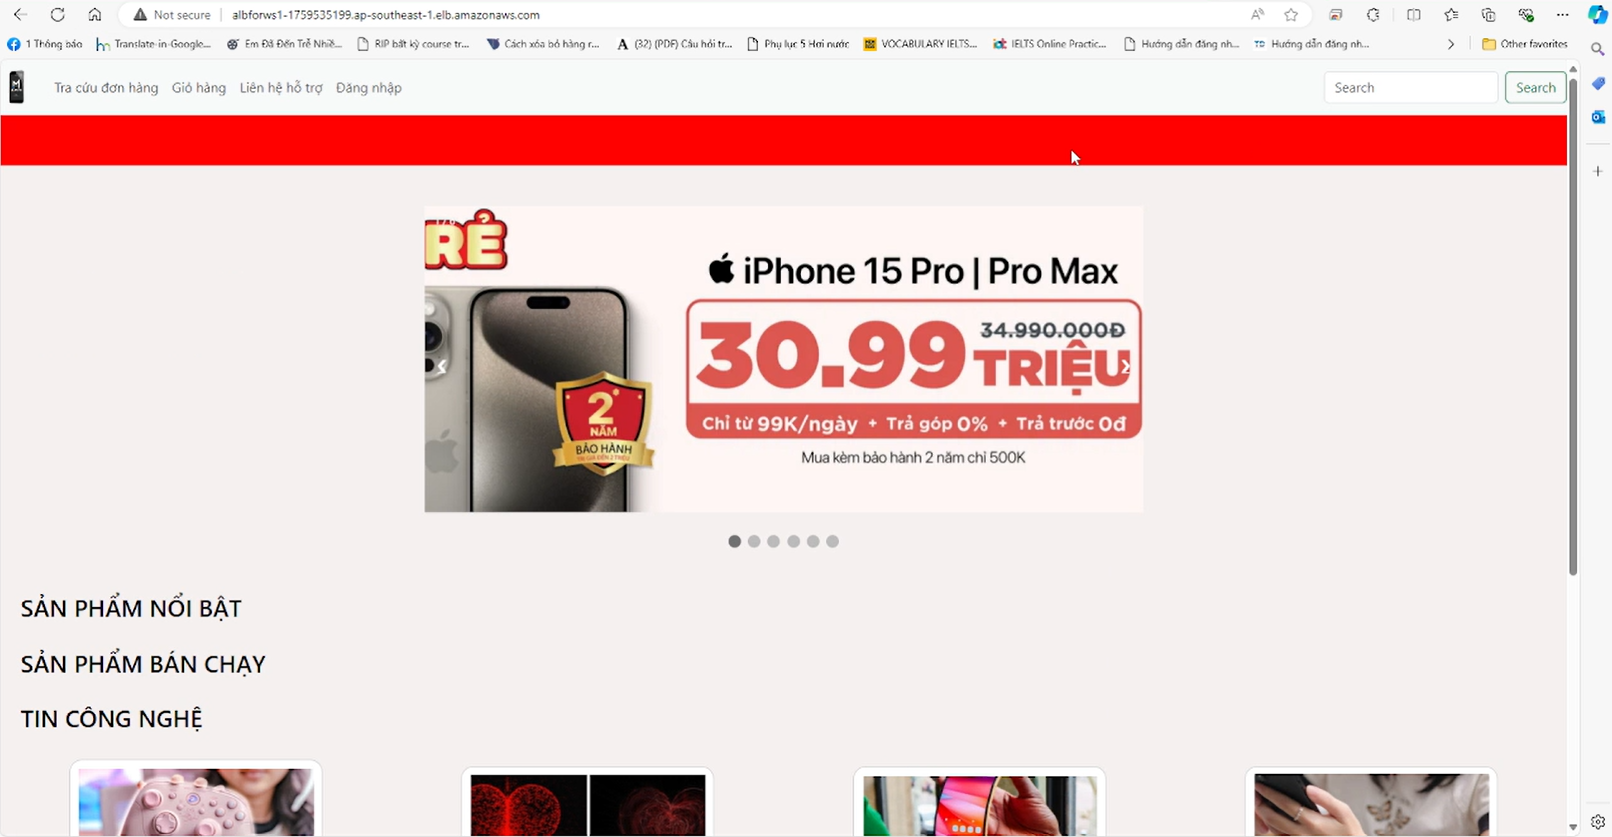
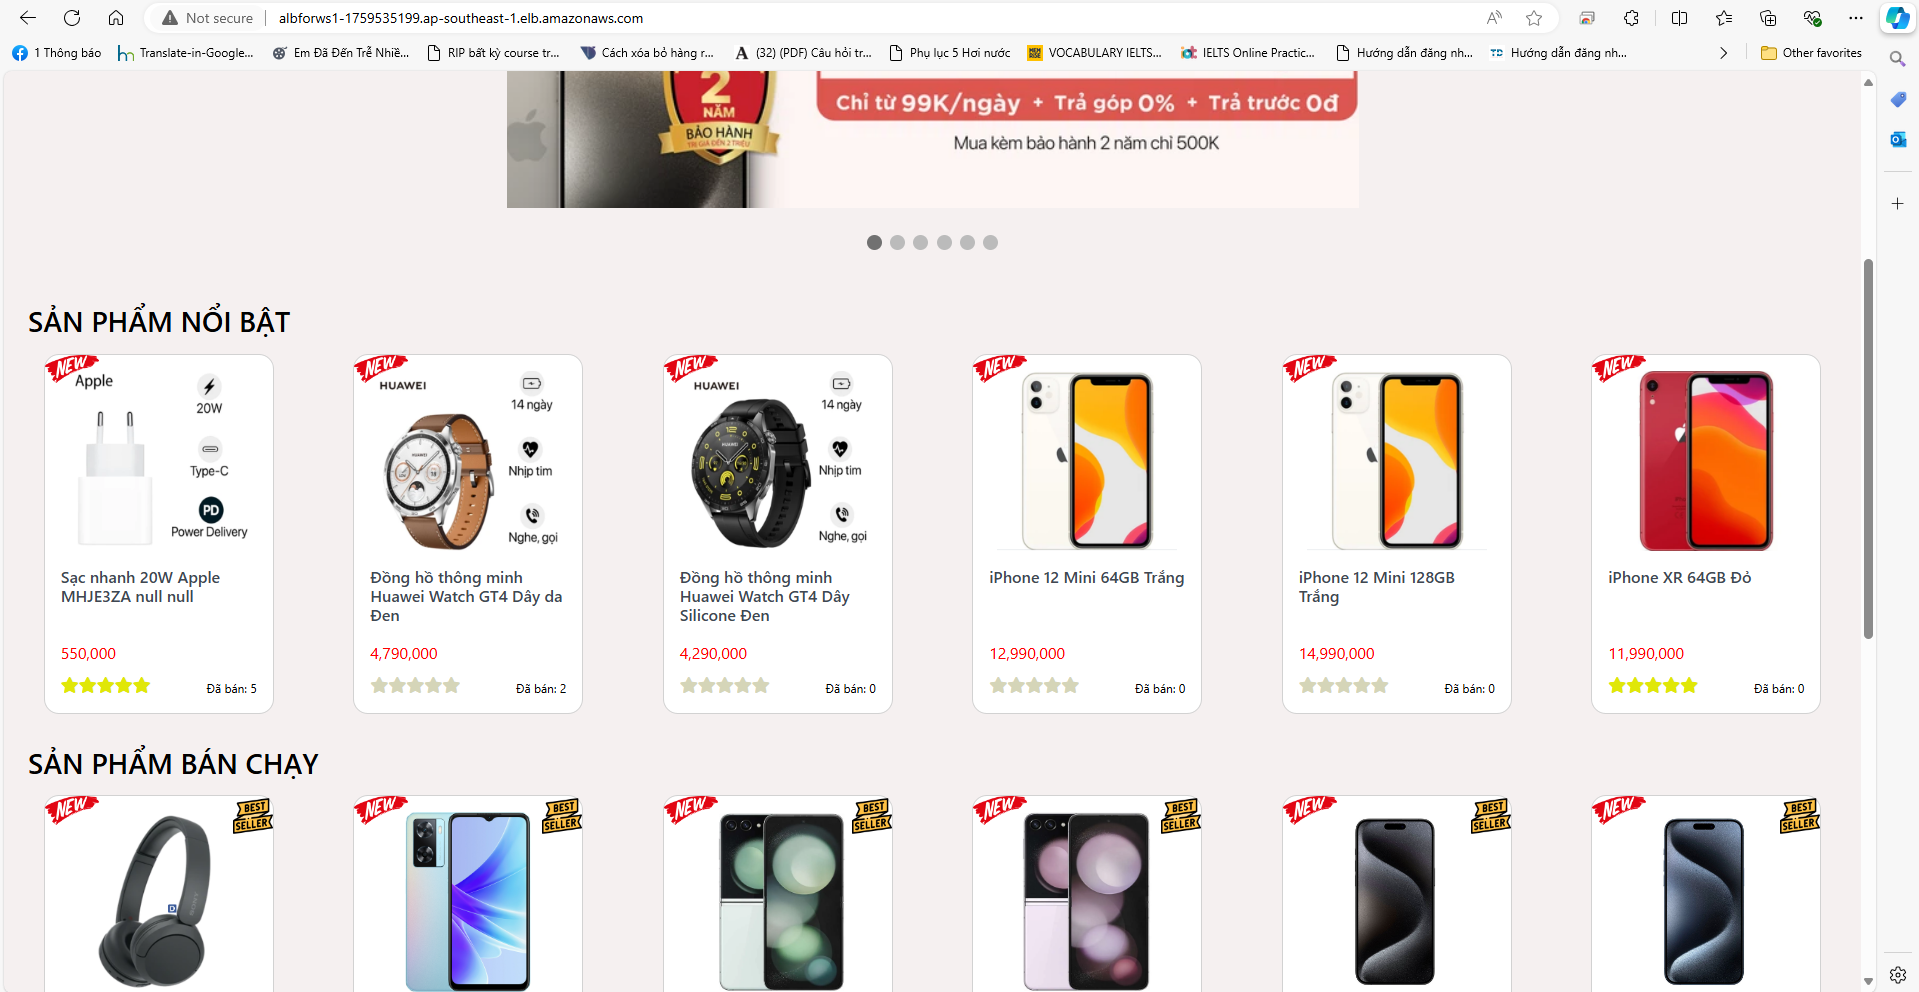
- Access the website from the ALB’s DNS
- Result when the application is successfully deployed
- Restore database from backup
- In the EC2 session manager interface, install postgresql-client.
yum install postgresql -y
pg_restore --version
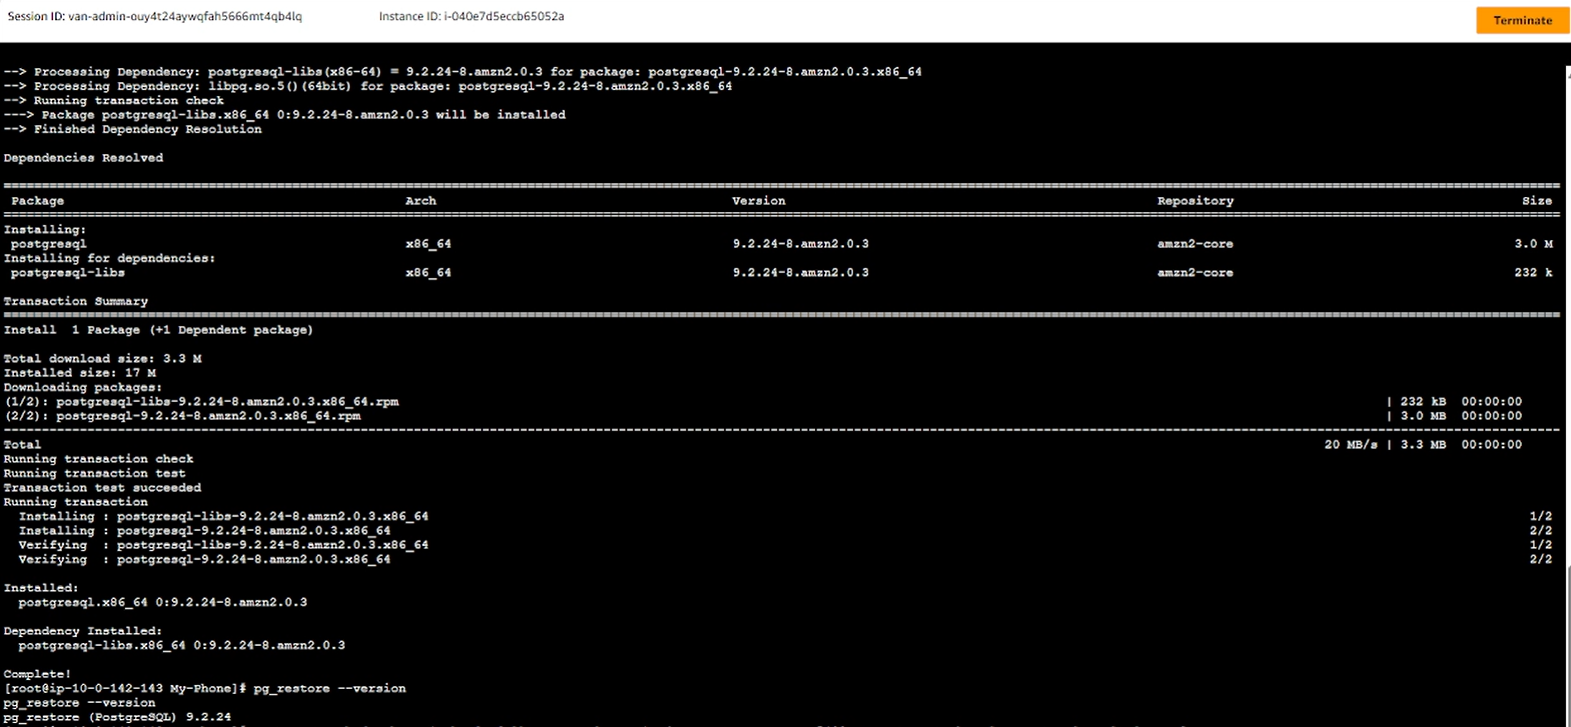
- Restore the database from the fileb mybackup.sql
pg_restore -h <RDS-endpoint> -p <port> -U <username> -d <database> -v <filebackup.sql>
The version of postgresql from the backup file must match the version of postgresql installed on EC2.
- After restoring, check the website again.
- Create Auto Scaling Group
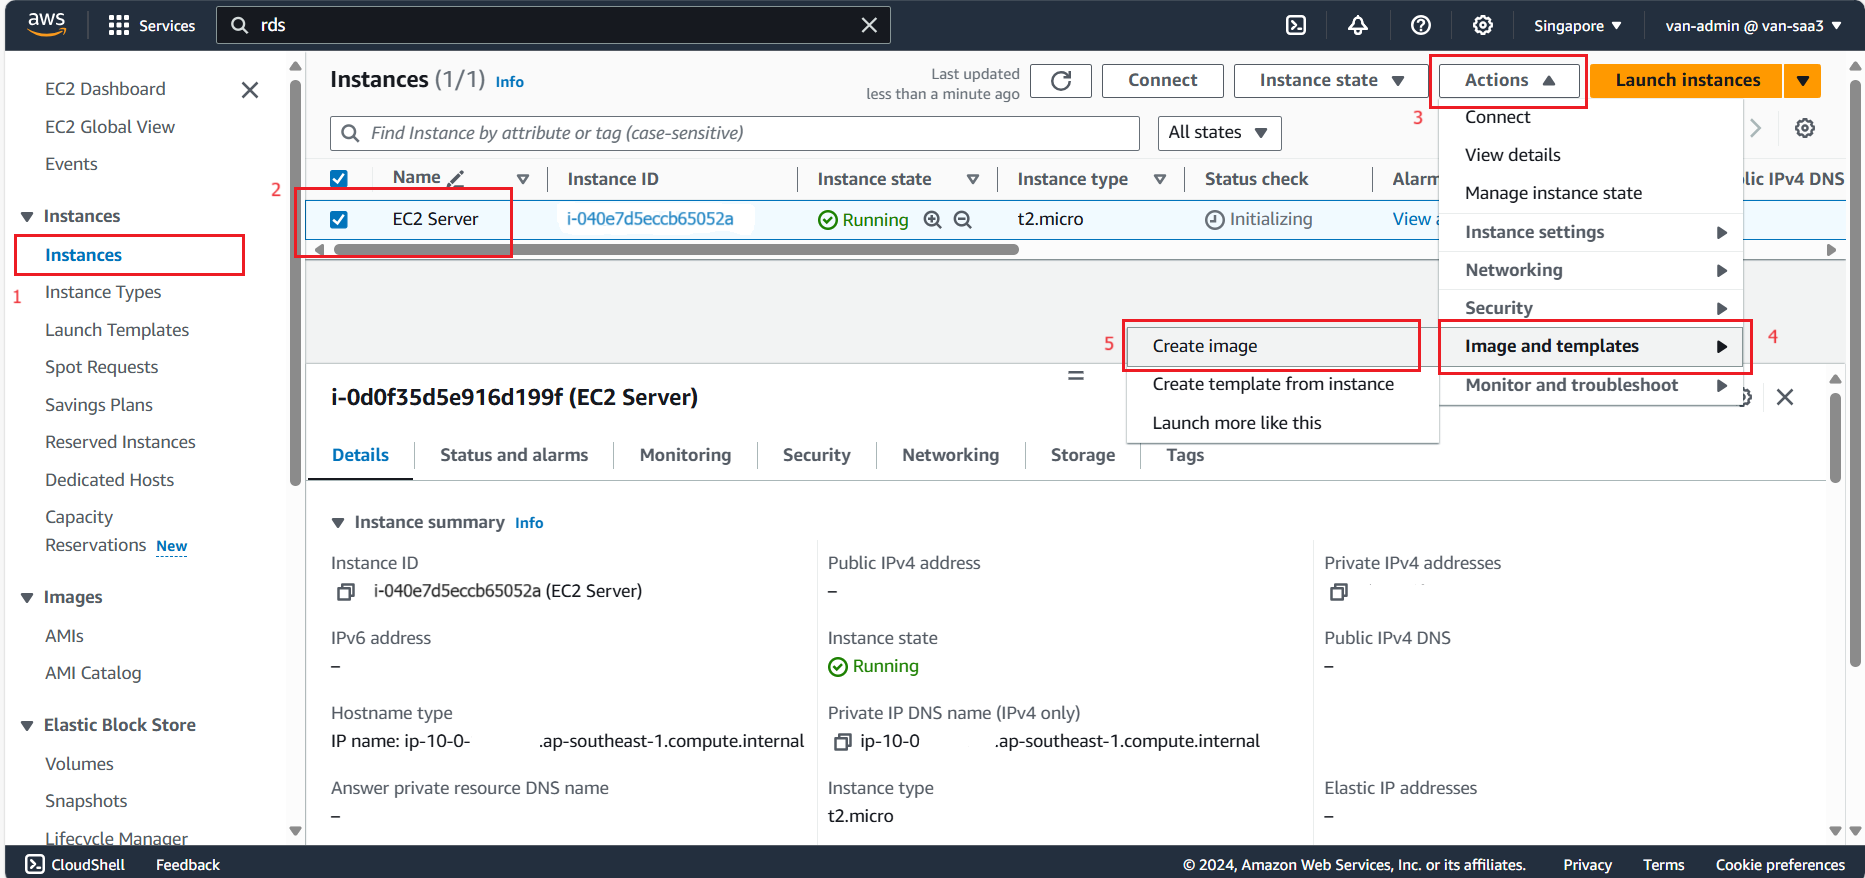
- Go to the EC2 service management interface page.
- Select Instances.
- Select EC2 Server.
- Select Action.
- Select Image and templates.
- Select Create image.
- Fill in the image name and description.
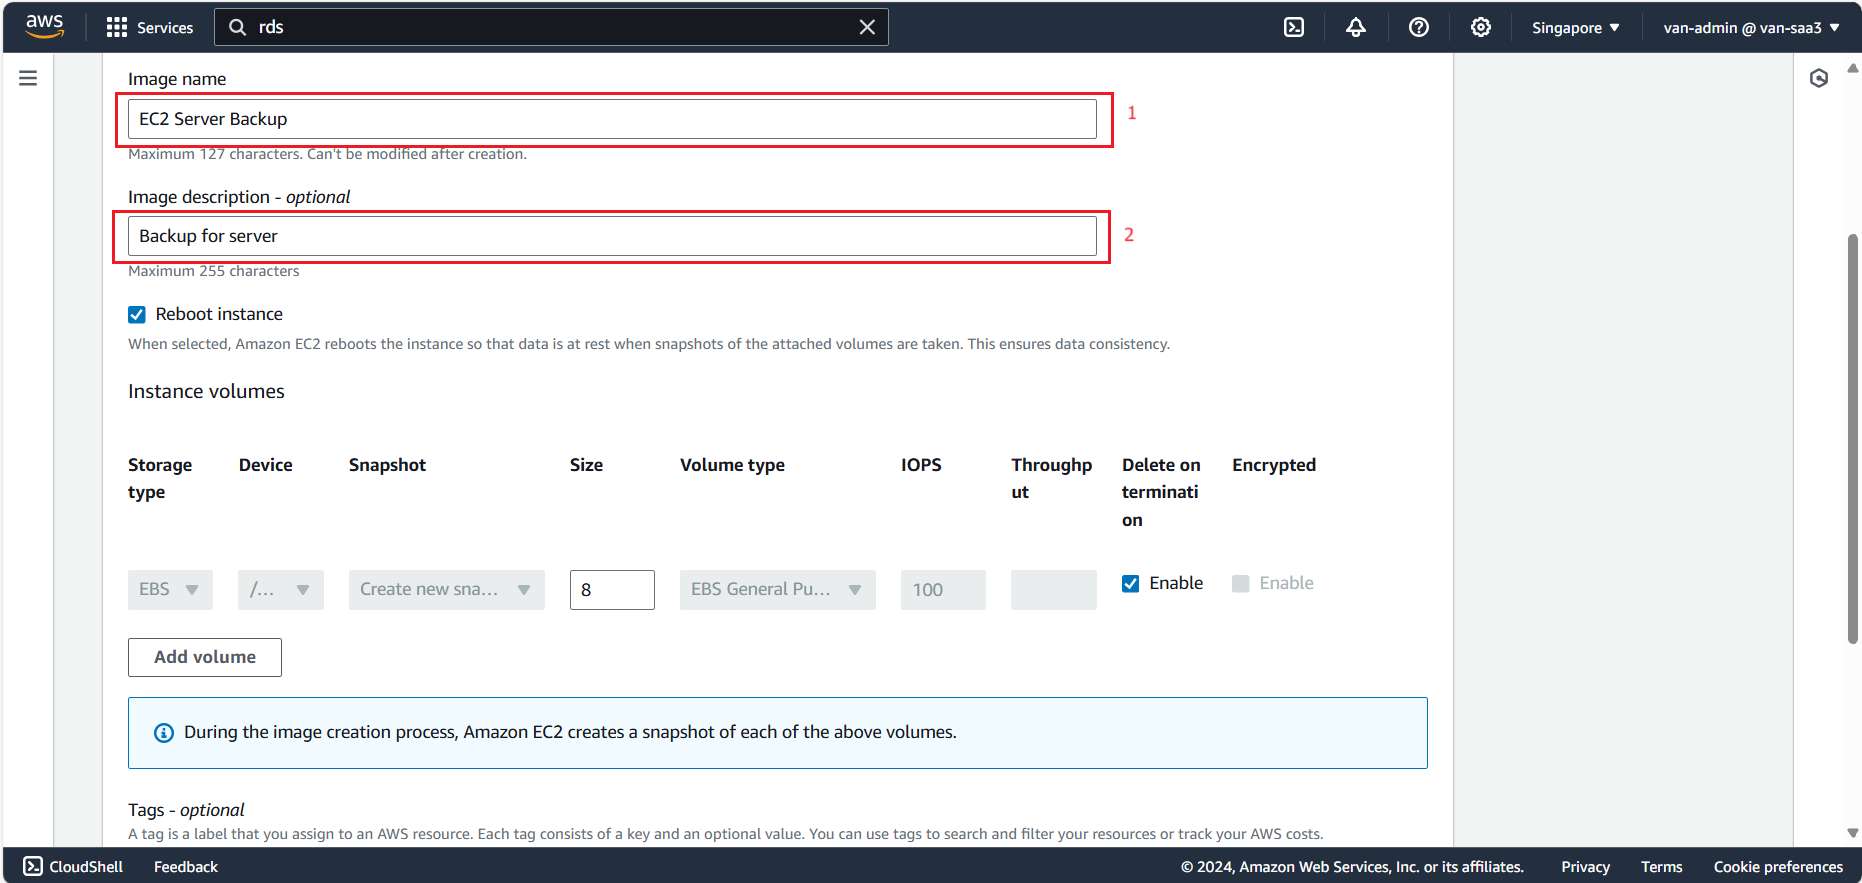
- Keep the default configurations, select Create image.

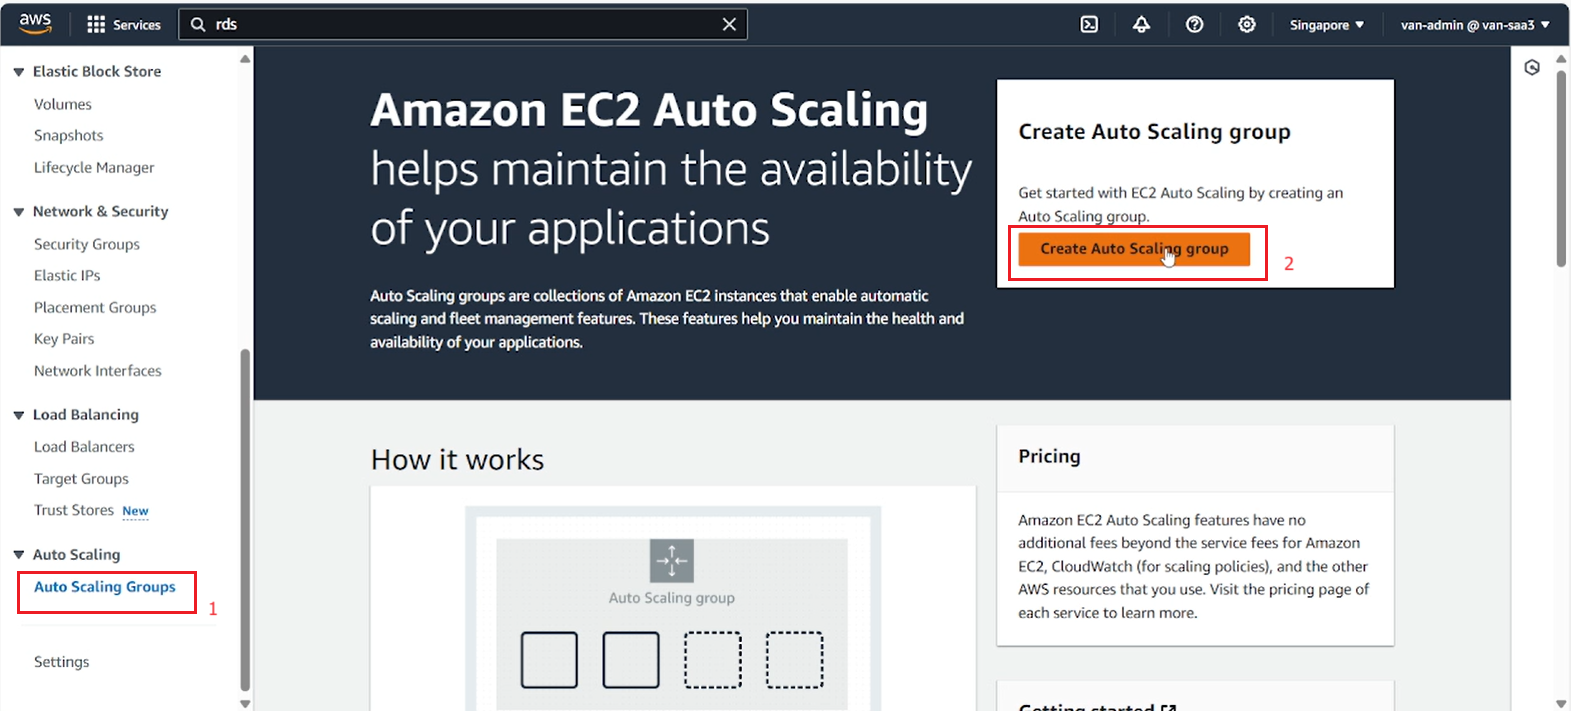
- Switch to EC2 service management interface, select Auto Scaling Group, select Create Auto Scaling Group.
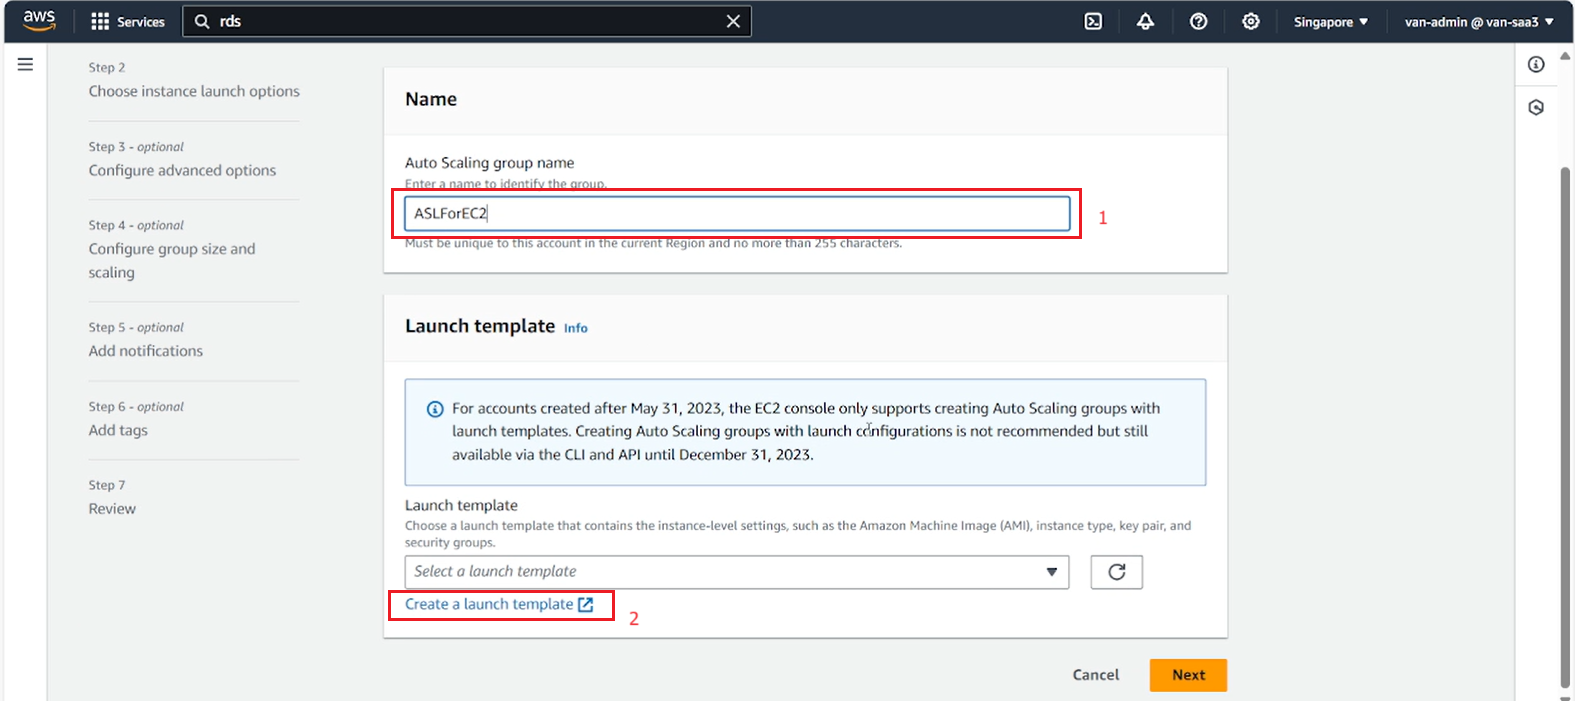
- Fill in the Auto Scaling Group name and select Create launch template.
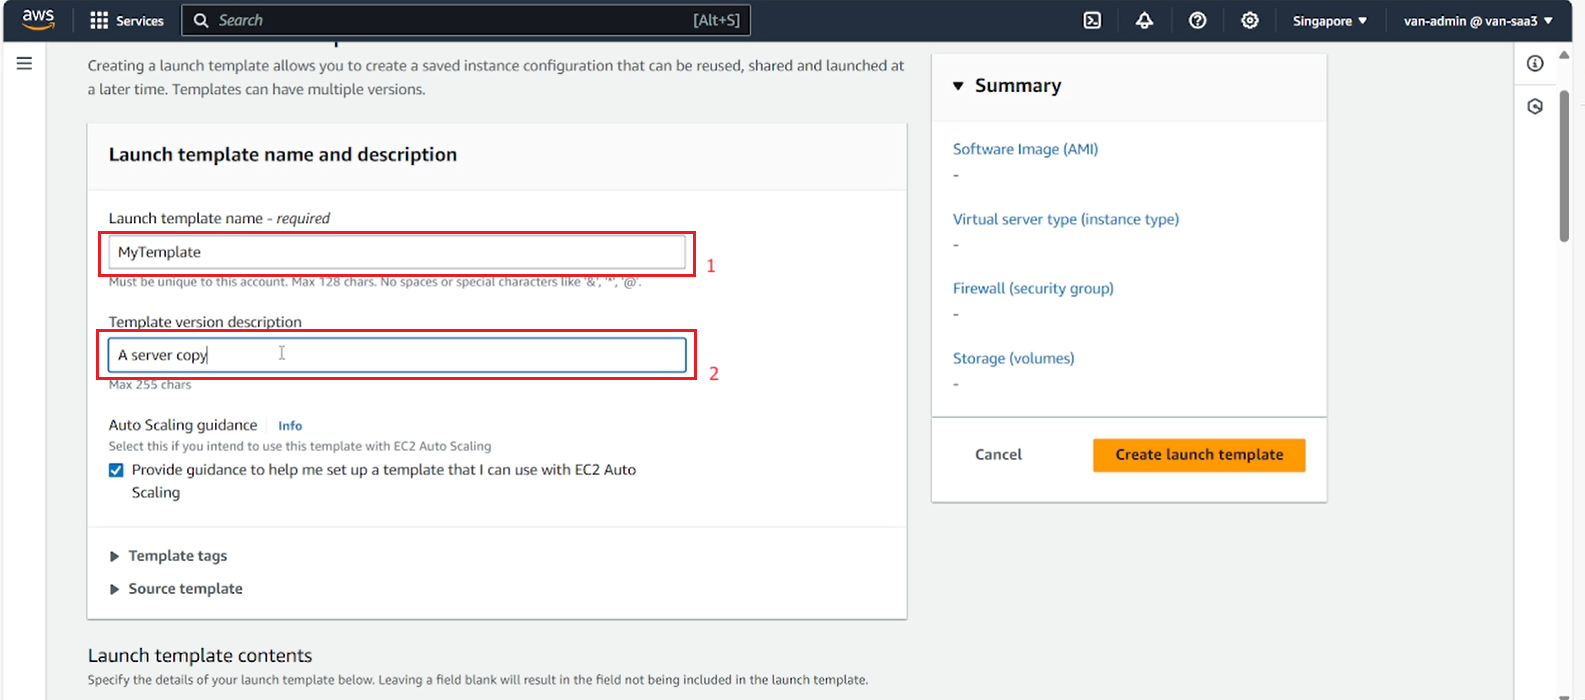
- In the template creation interface, fill in the template name and description.
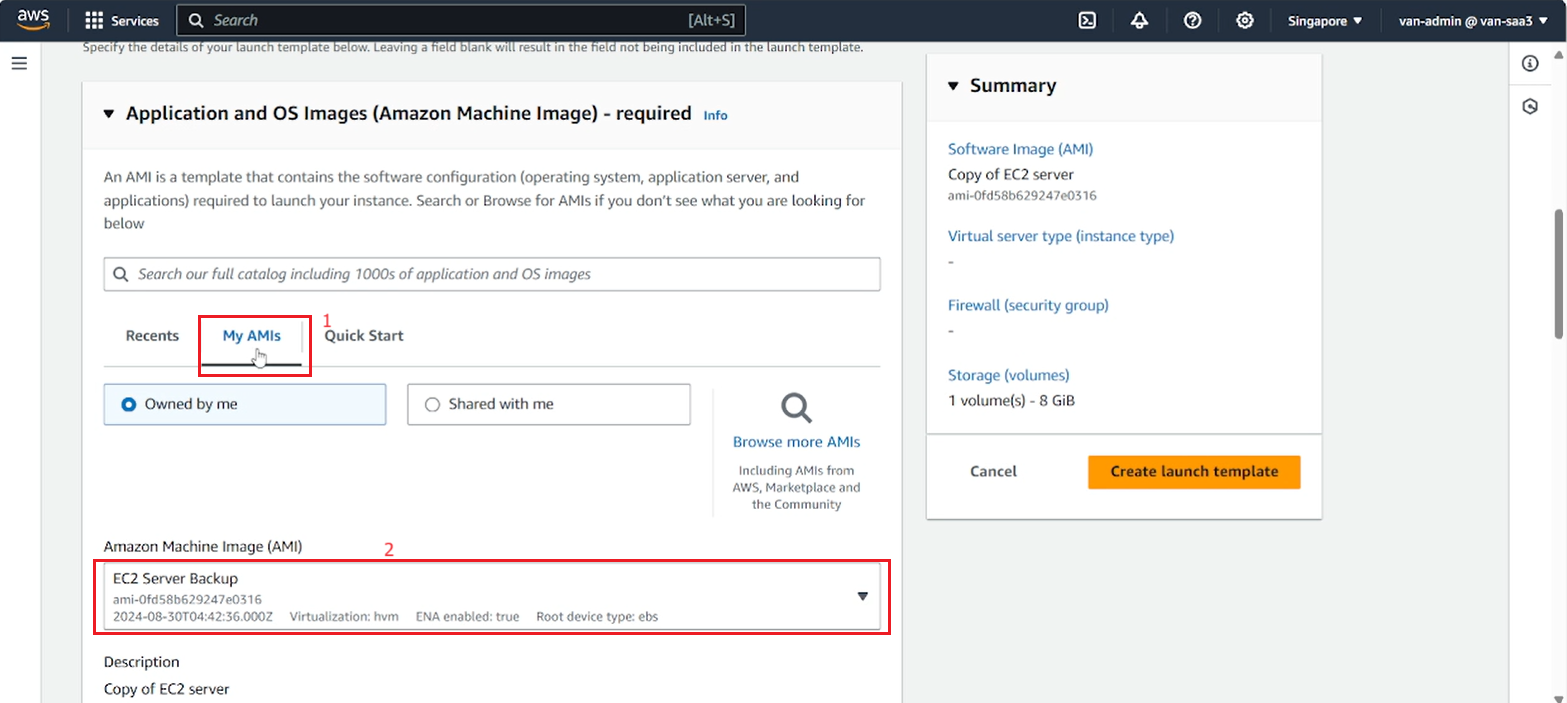
- Select Application and OS Images which is the AMI created above.
- Select the Instance type and Key pair you want.
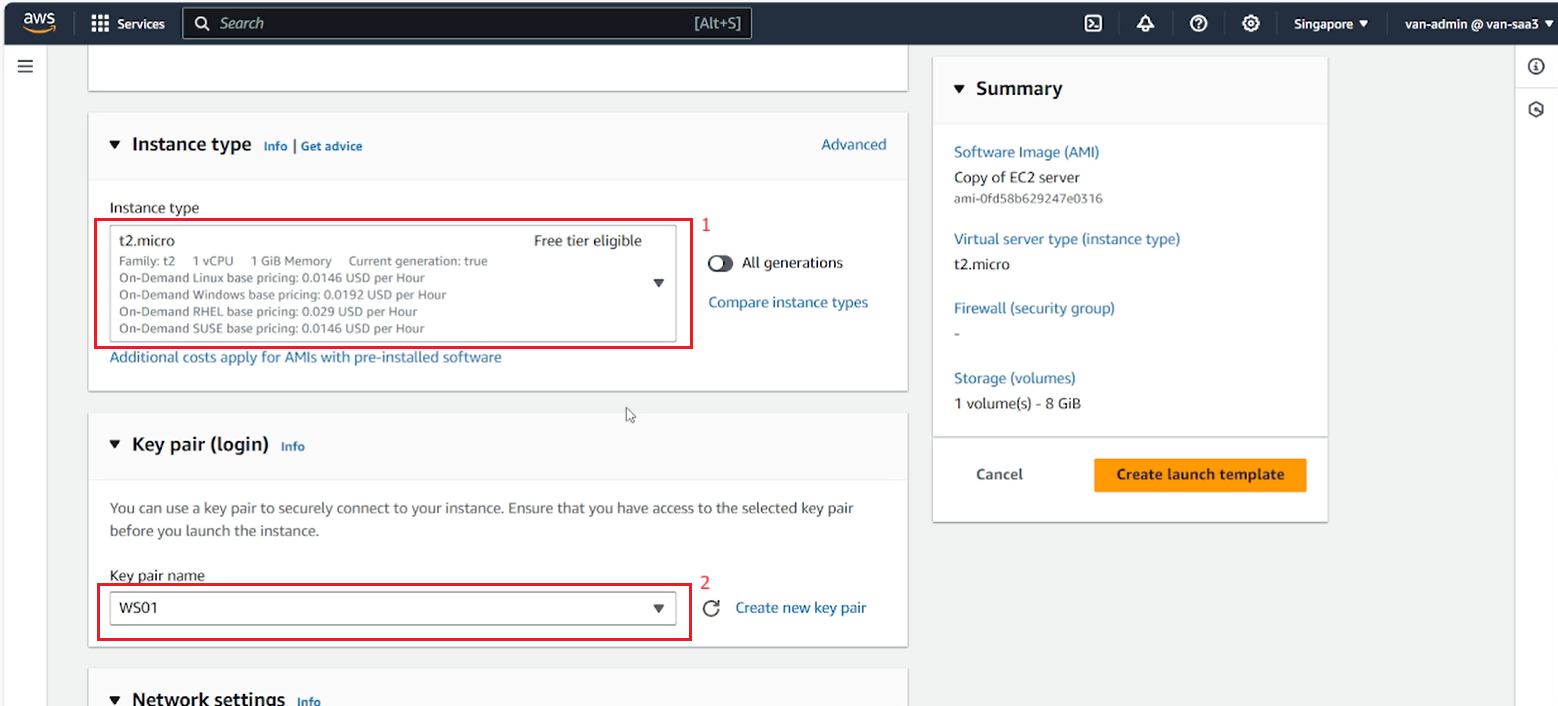
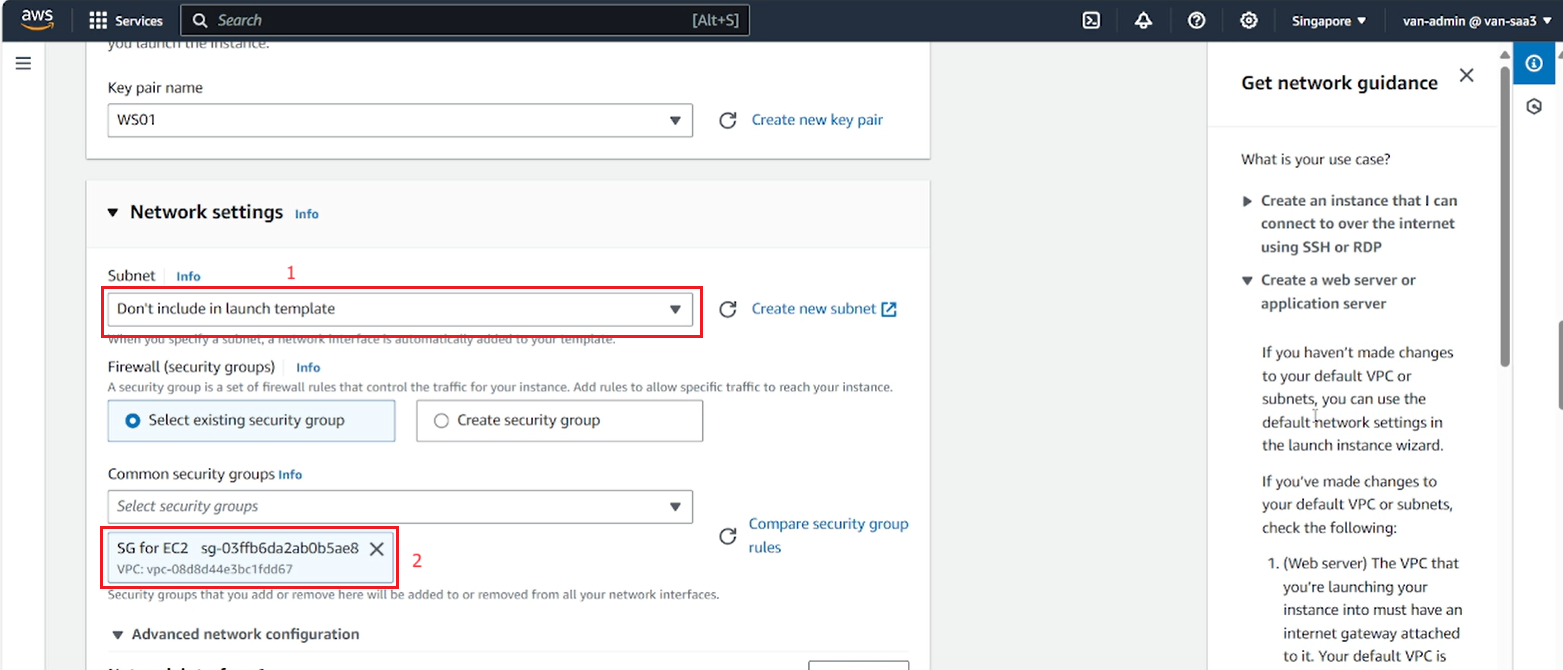
- Leave the default in Network settings.
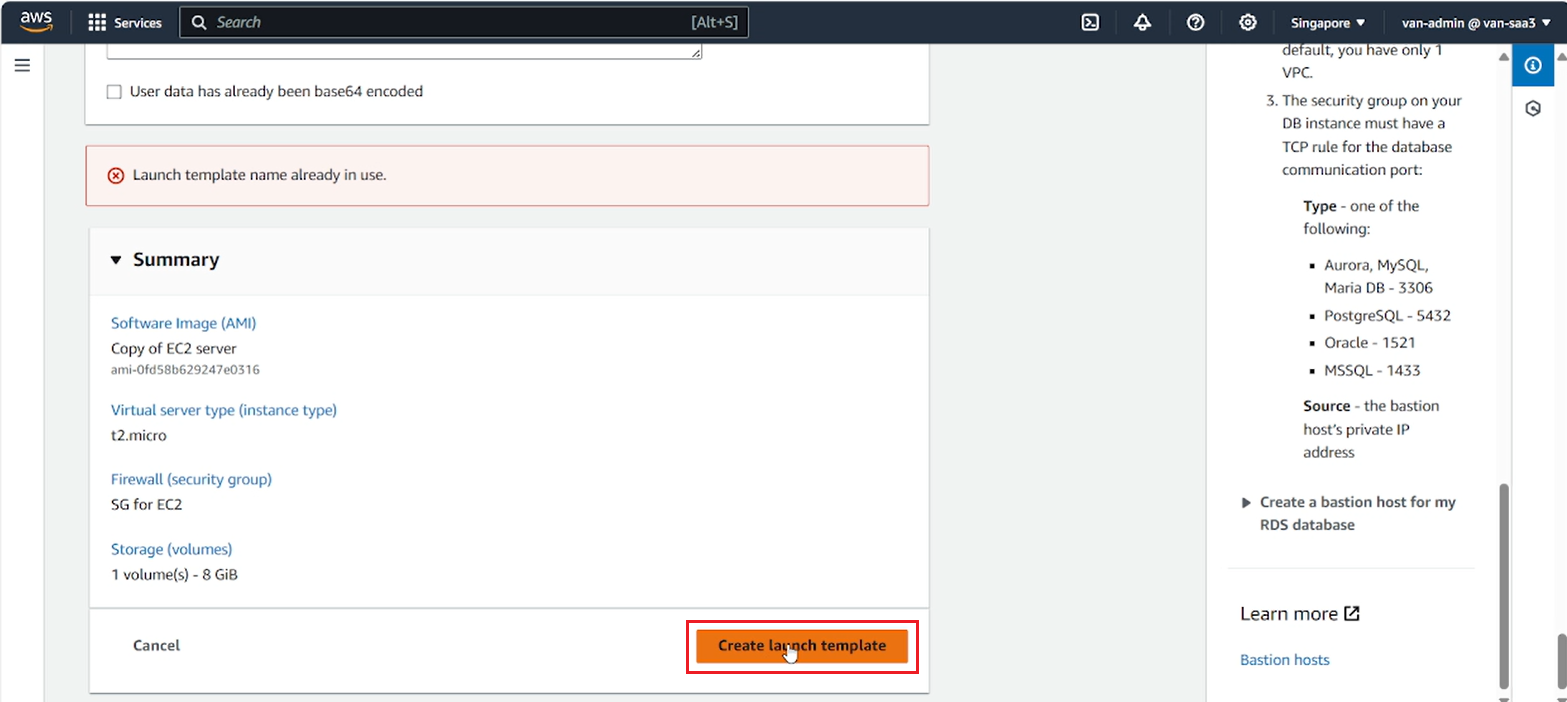
- Check the options again, select Create launch template.
-
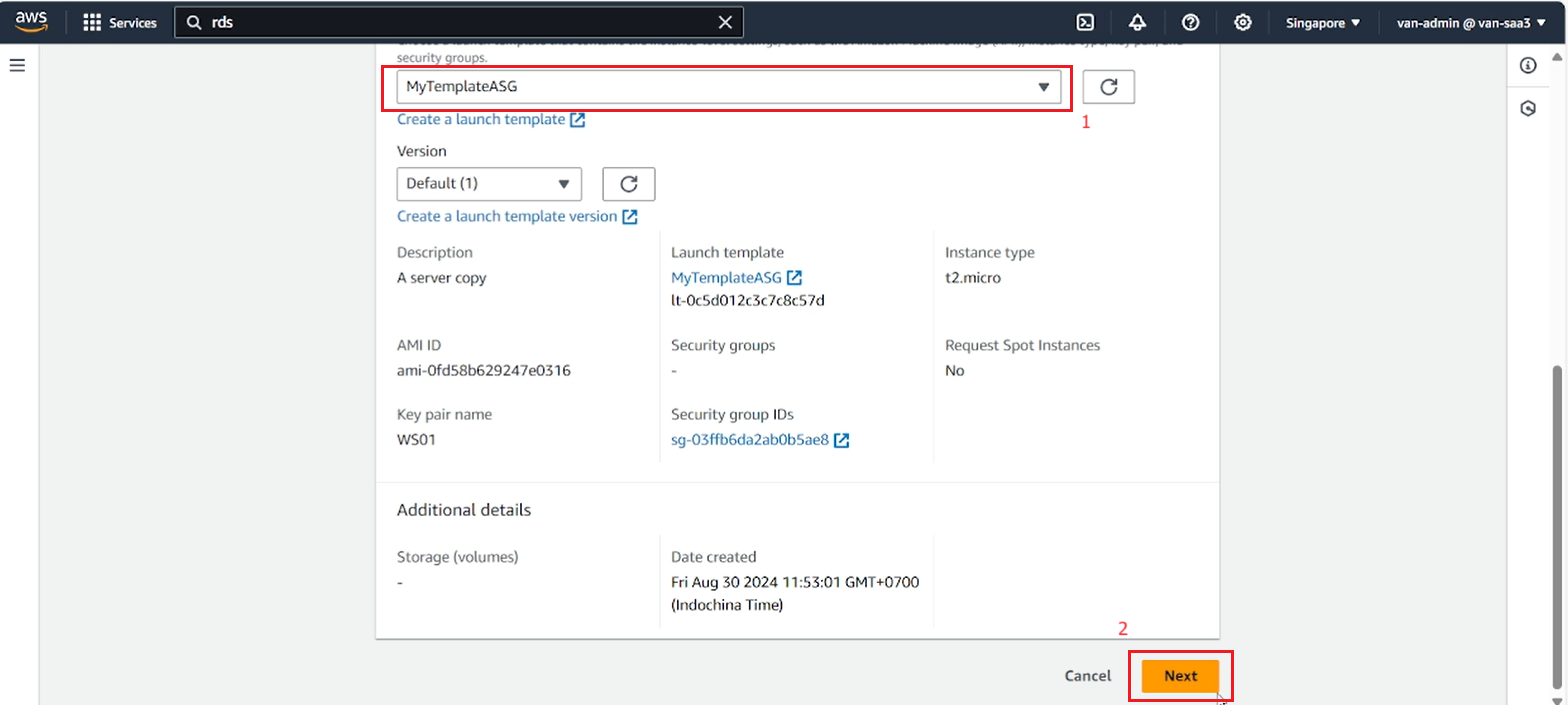
Go to the ASG creation page, refresh the Launch template, select the launch template you just created.
-
Select Next.
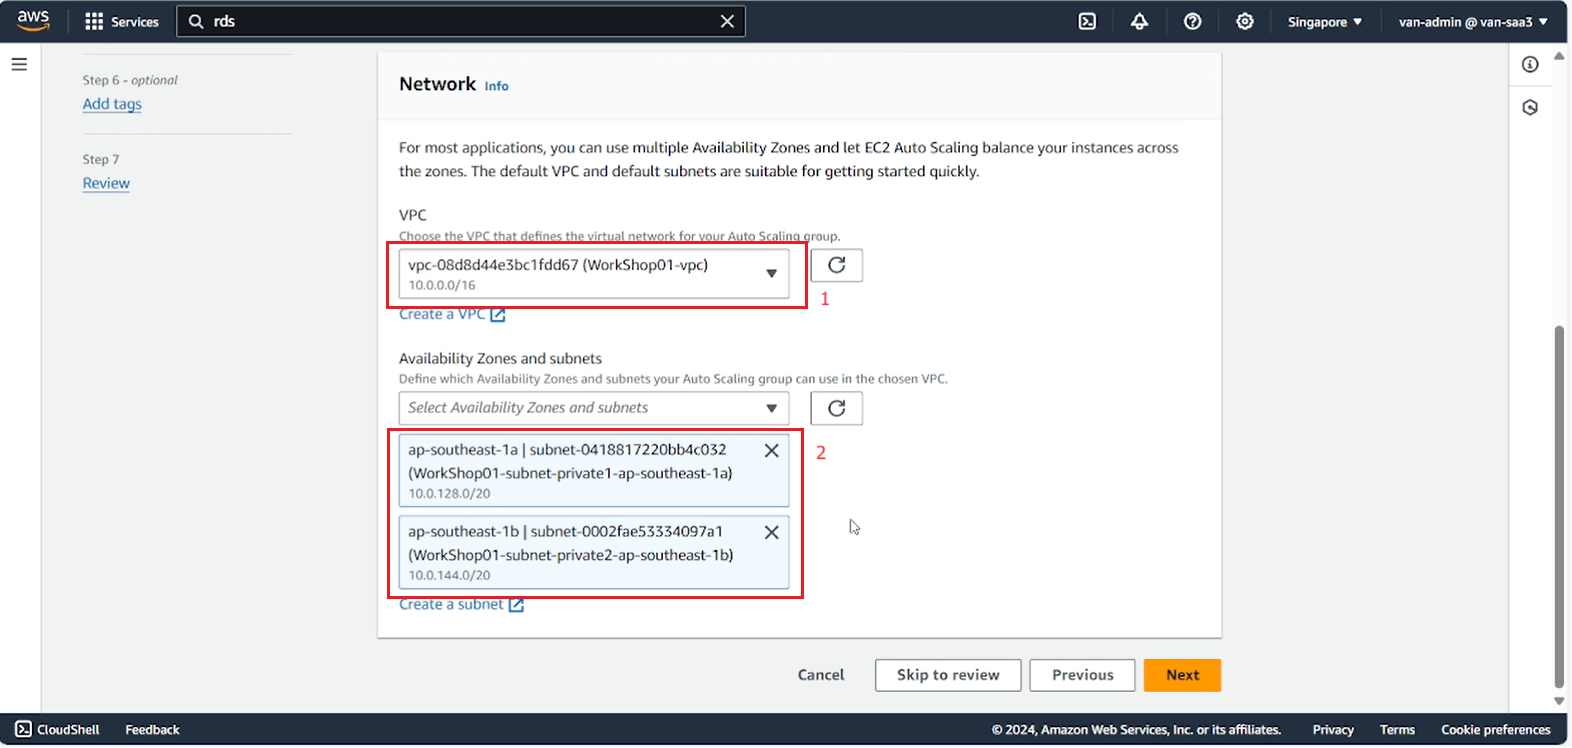
- On the next page, in Network select the lab’s VPC, select the 2 private subnets you need to create EC2 inside.
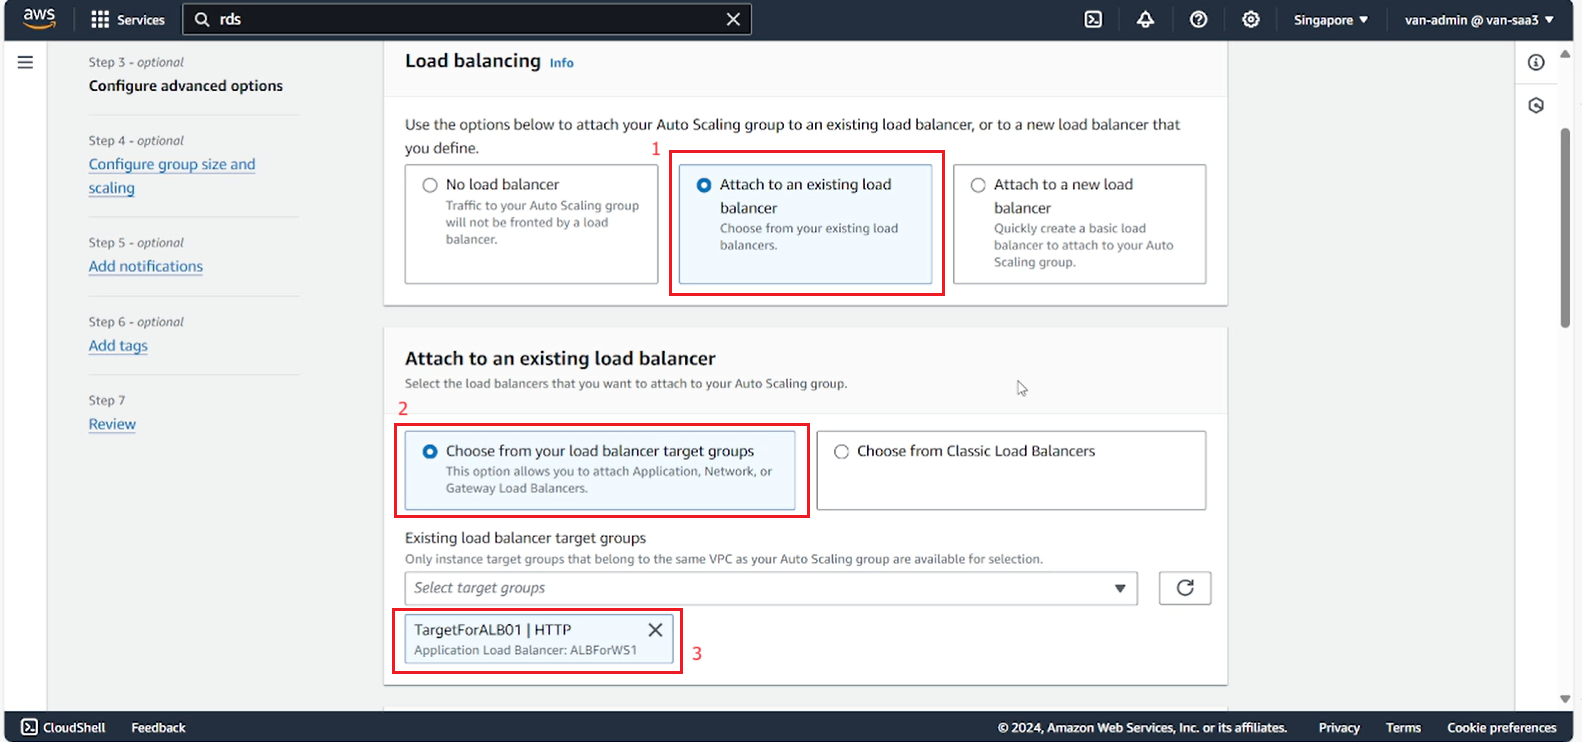
- In the Load balancing section, select the created ALB, then select Next.
- Fill in the number of EC2s you want to create, according to the architecture we need 2 EC2s in 2 different AZs. Fill in the minimum number of EC2s to maintain, the maximum number of EC2s to deploy.
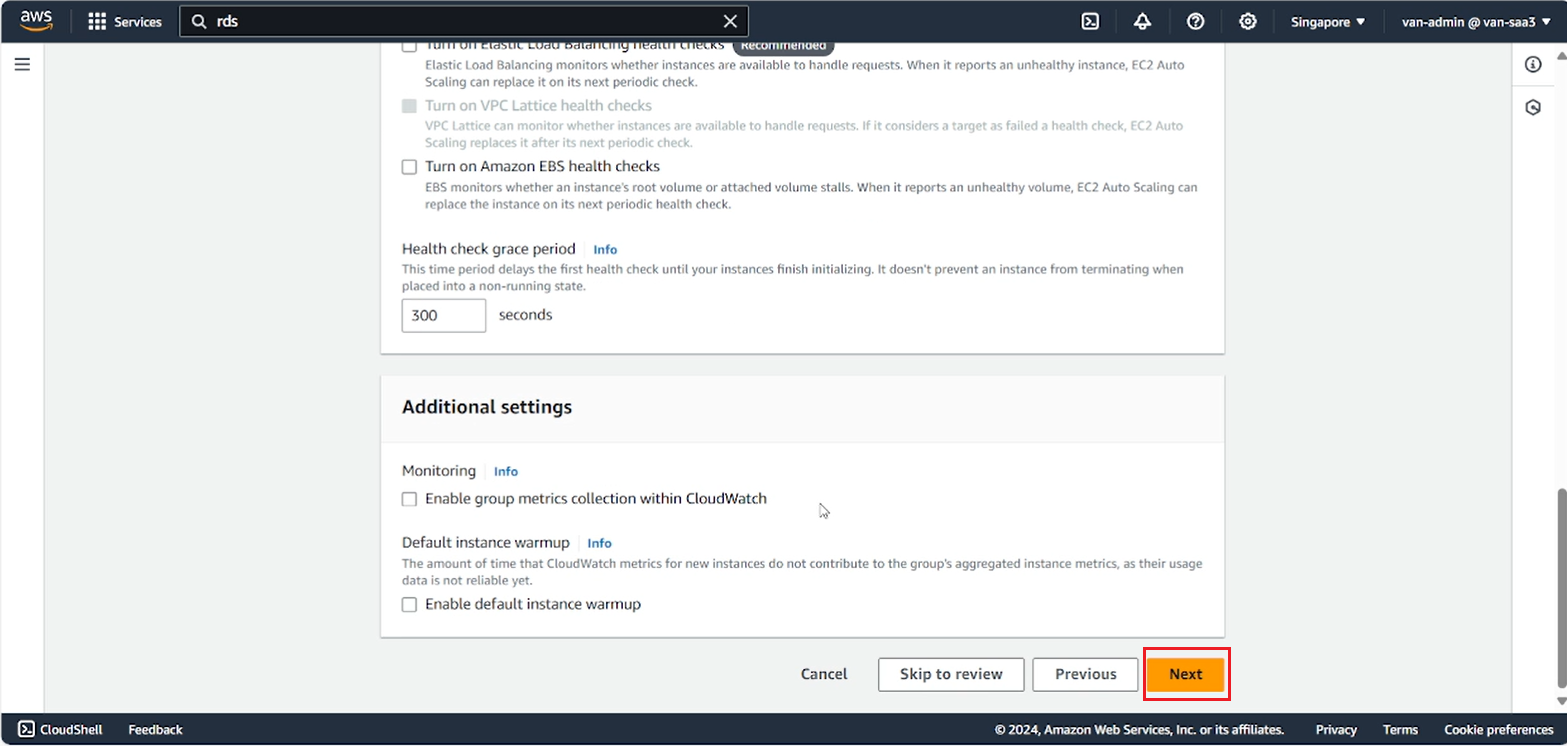
- Continue to select Next in Step 5 and Step 6.
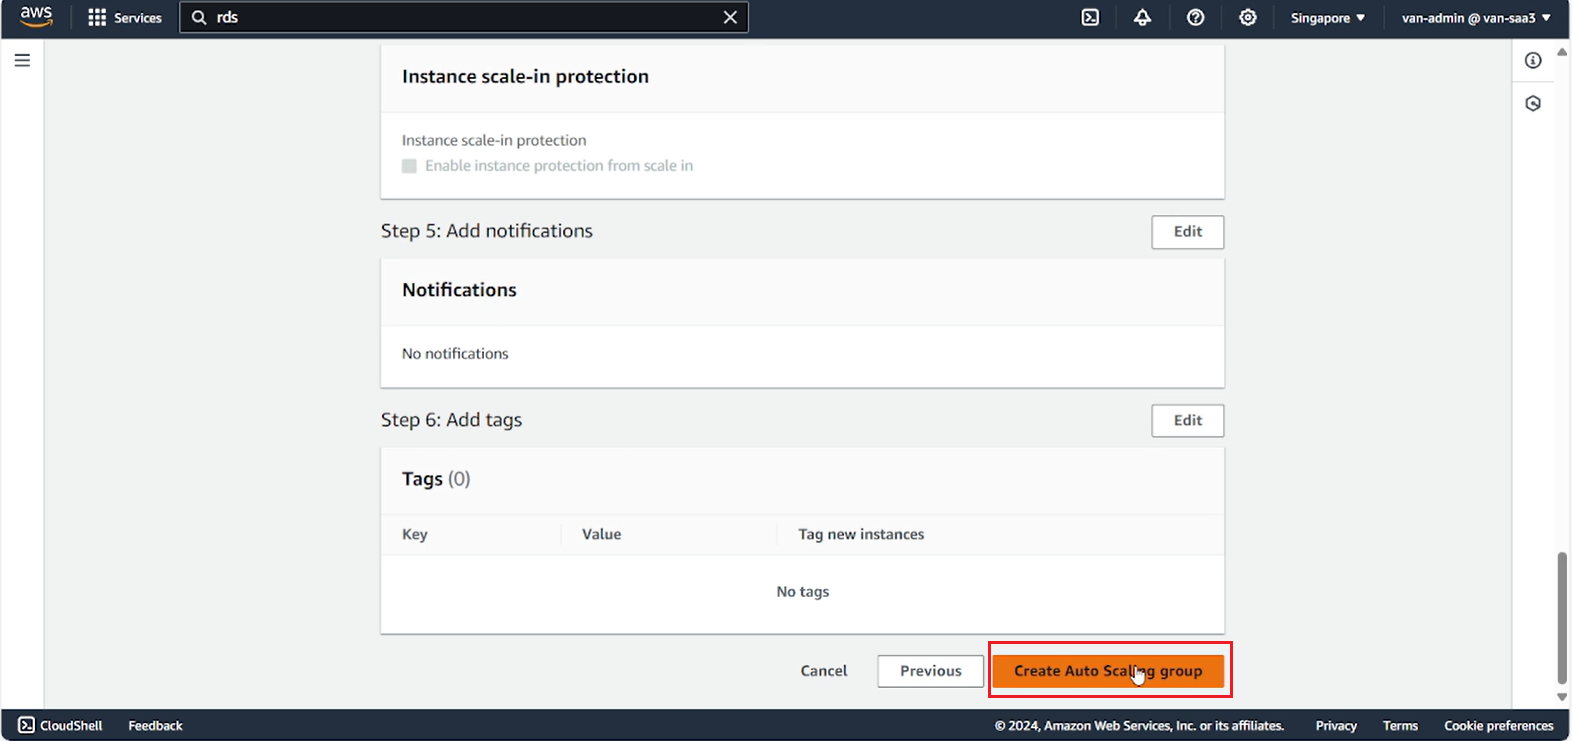
- Review the settings again, select Create Auto Scaling Group.
- After creating, you need to Attach the original EC2 to ASG.
- Select Instances.
- Select EC2 Server.
- Select Actions.
- Select Instances settings.
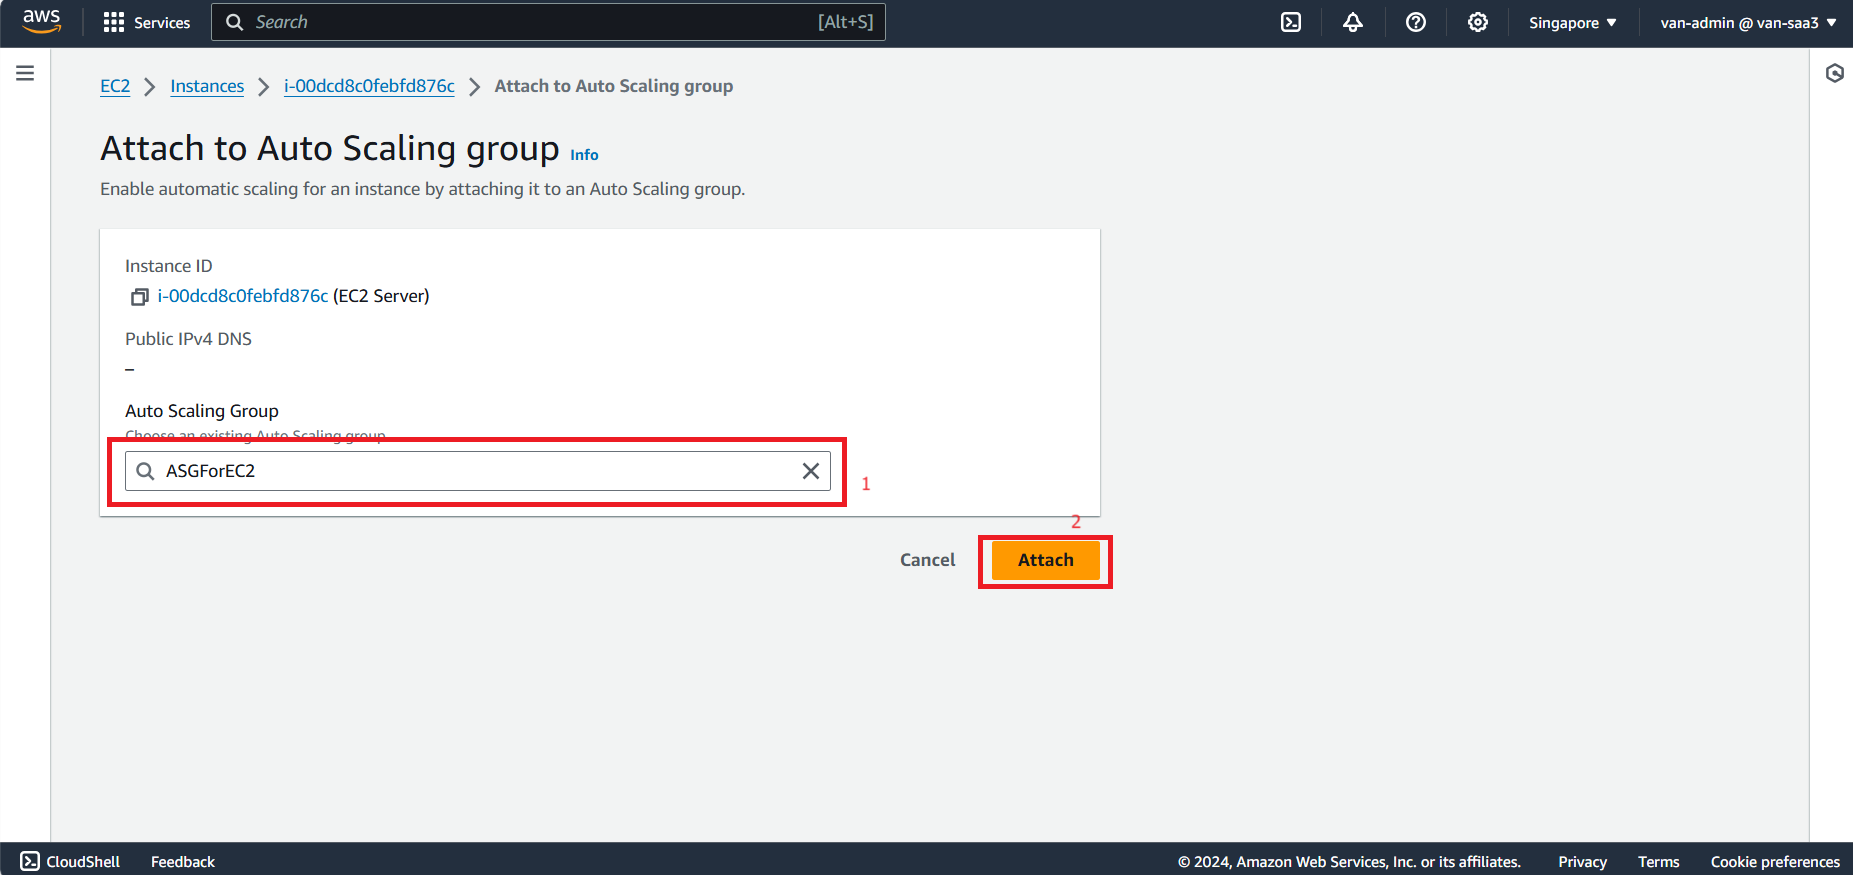
- Select Attach to Auto Scaling Group.
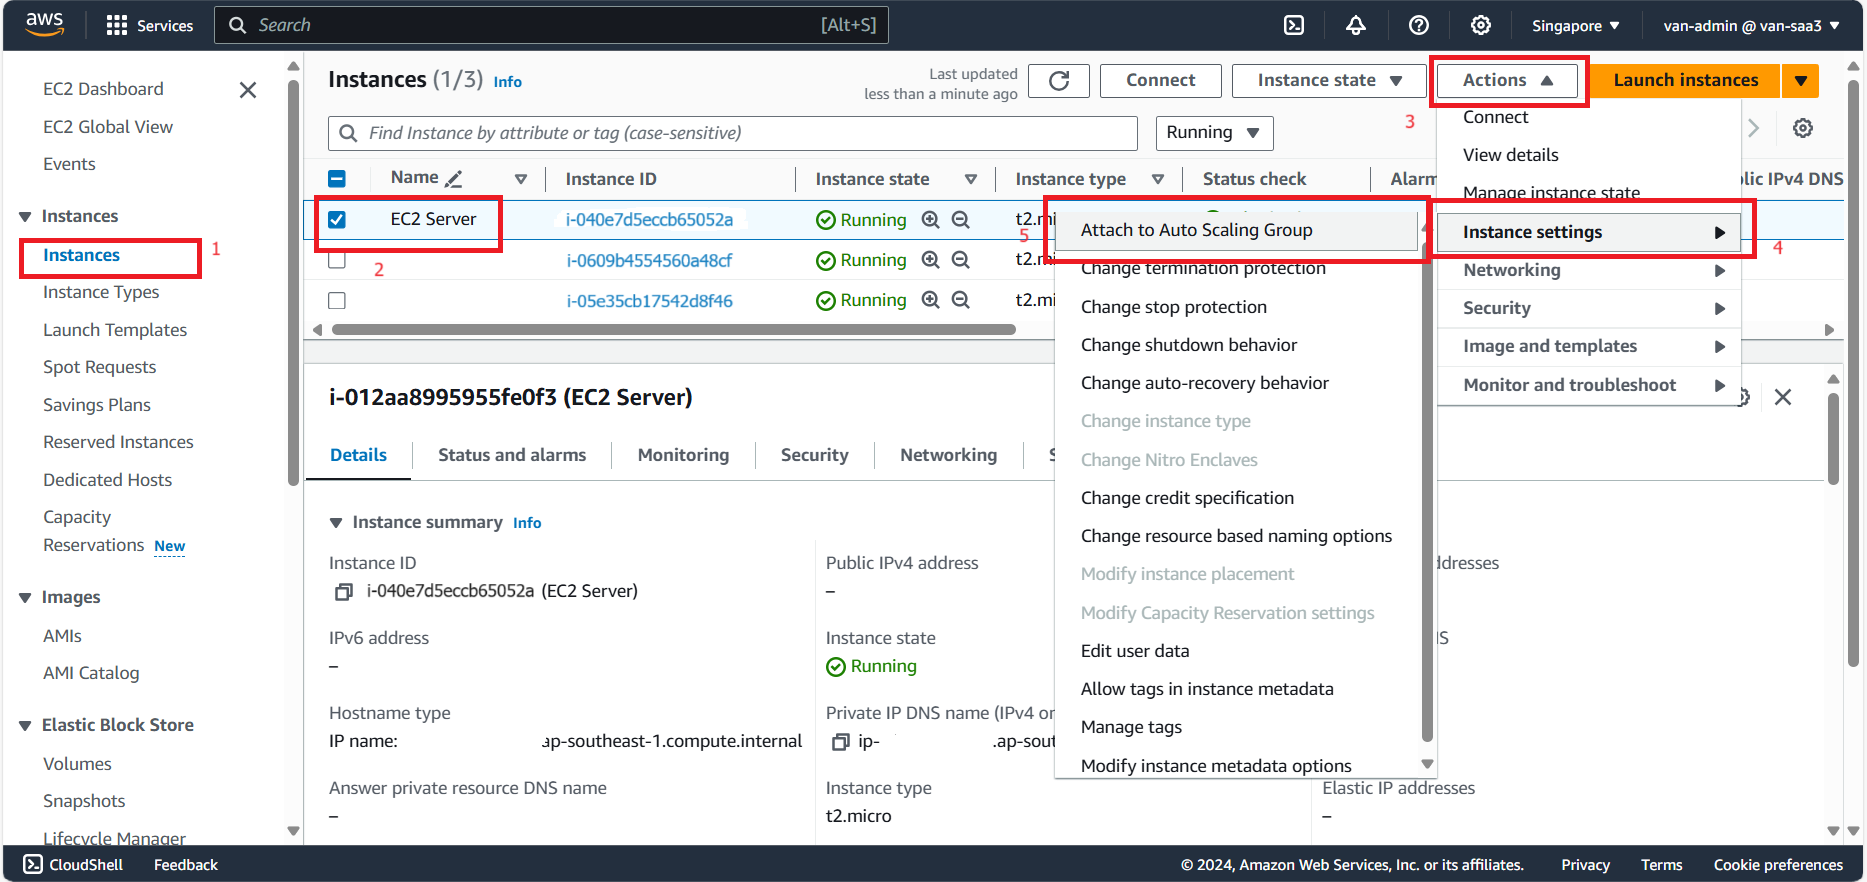
- Select the newly created ASG.
- After successfully assigning, in the Instance interface, delete the remaining instance.
