Preparing VPC
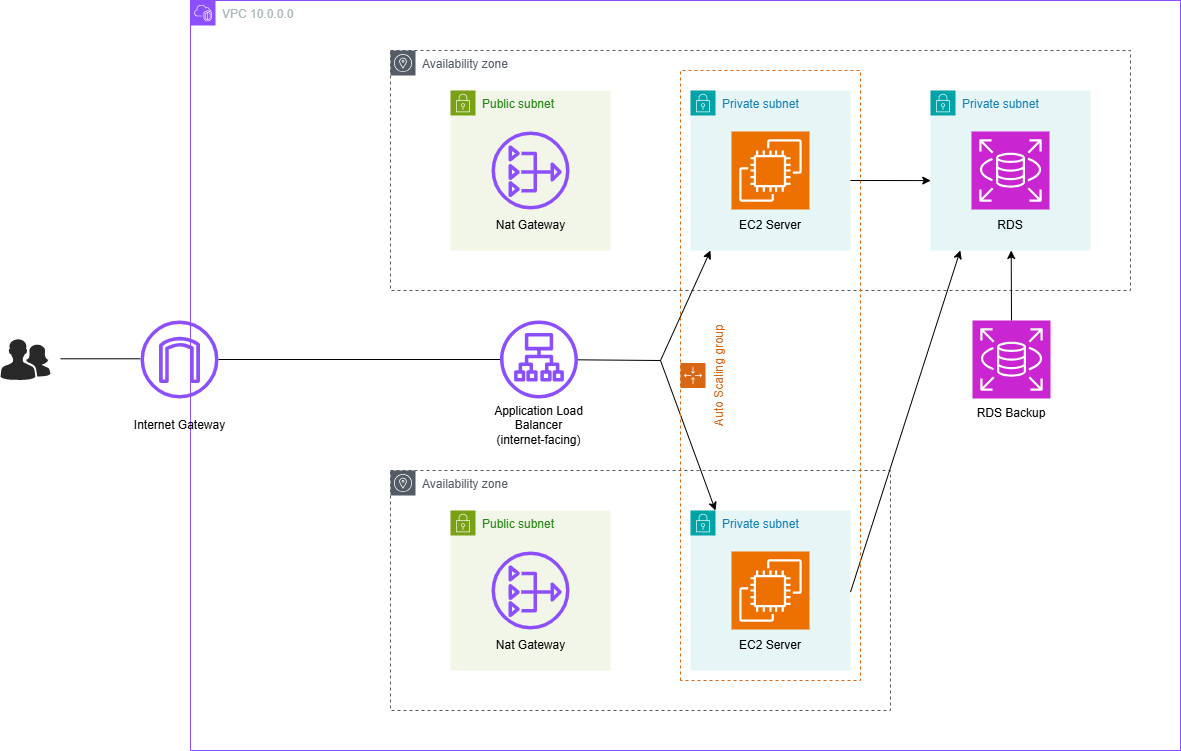
In this step, we will need to create a VPC network architecture with 2 public subnets, 2 private subnets, an internet gateway and a NAT gateway. The overview of the architecture after you complete this step will be as follows:
Create VPC
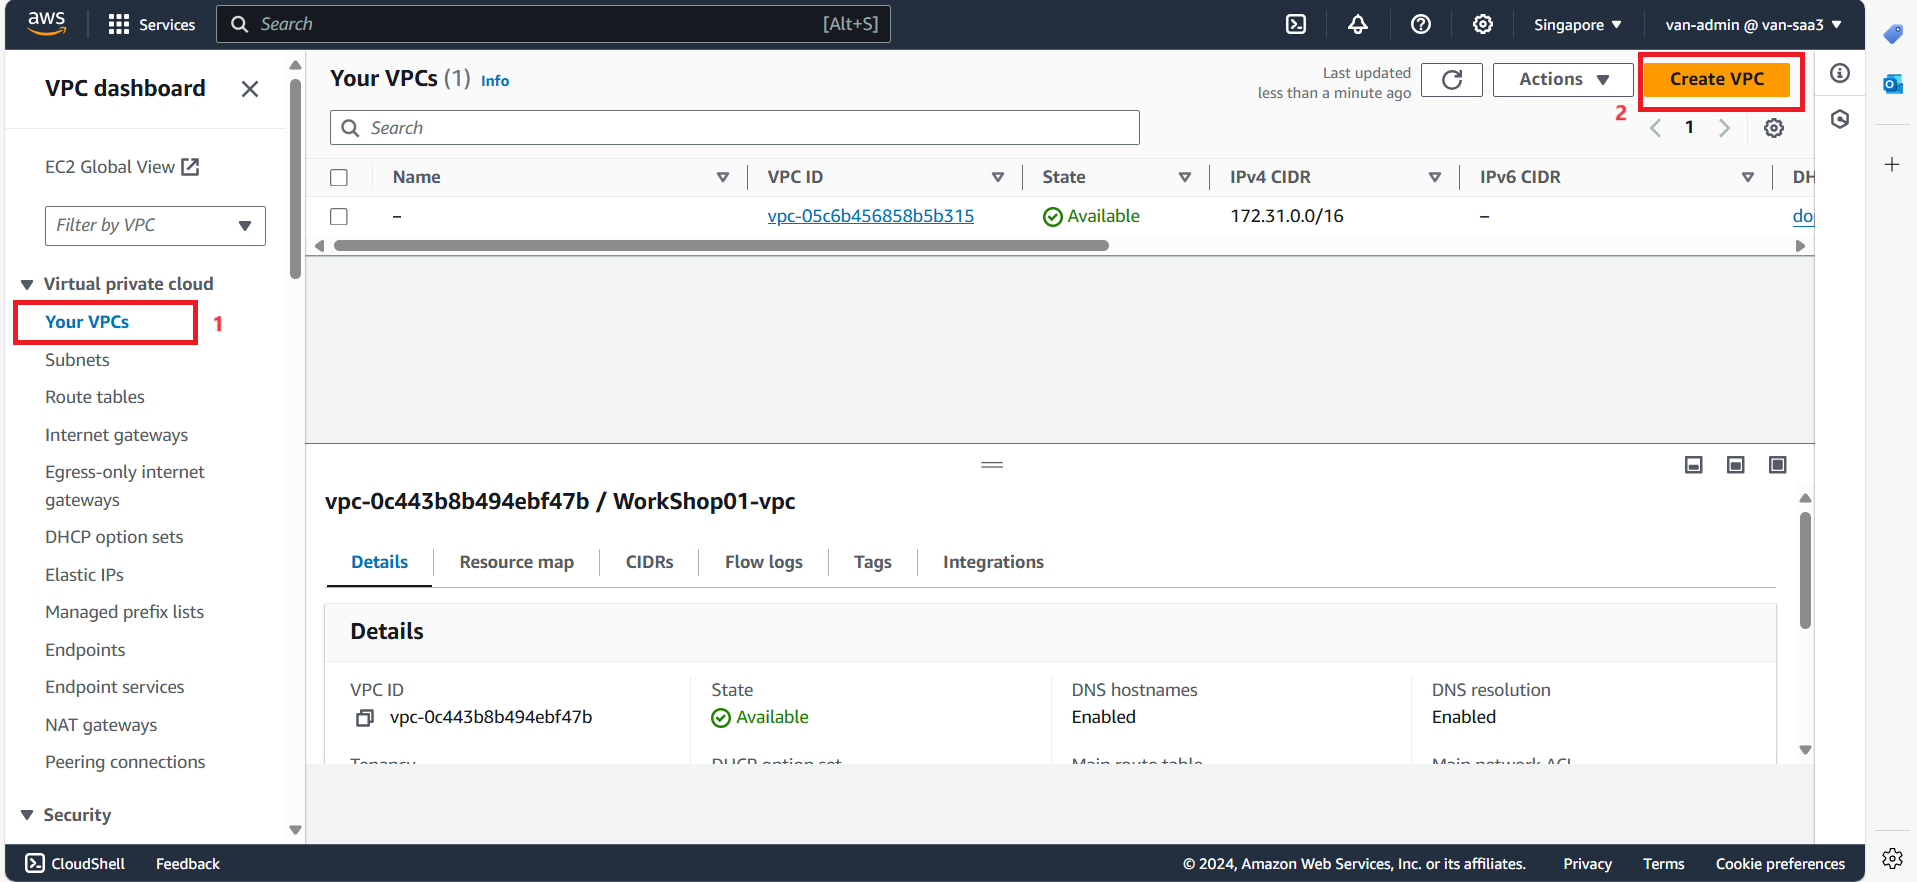
- Access the VPC service management interface
-
Select Your VPCs.
-
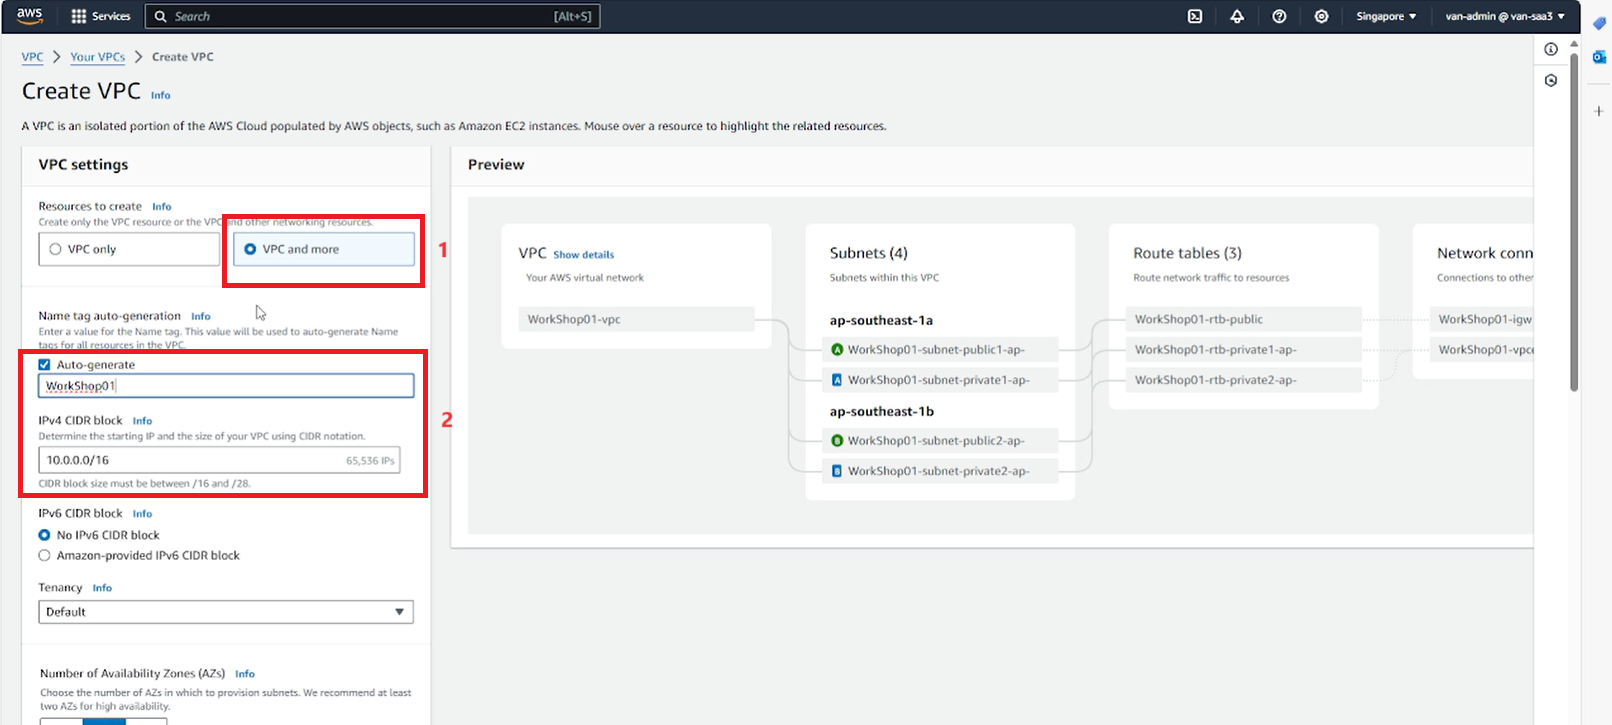
Select Create VPC.
- On the Step 1 page.
- Select VPC and more to quickly create the VPC architecture as required.
- Fill in the VPC name and IPv4 range you want to create
-
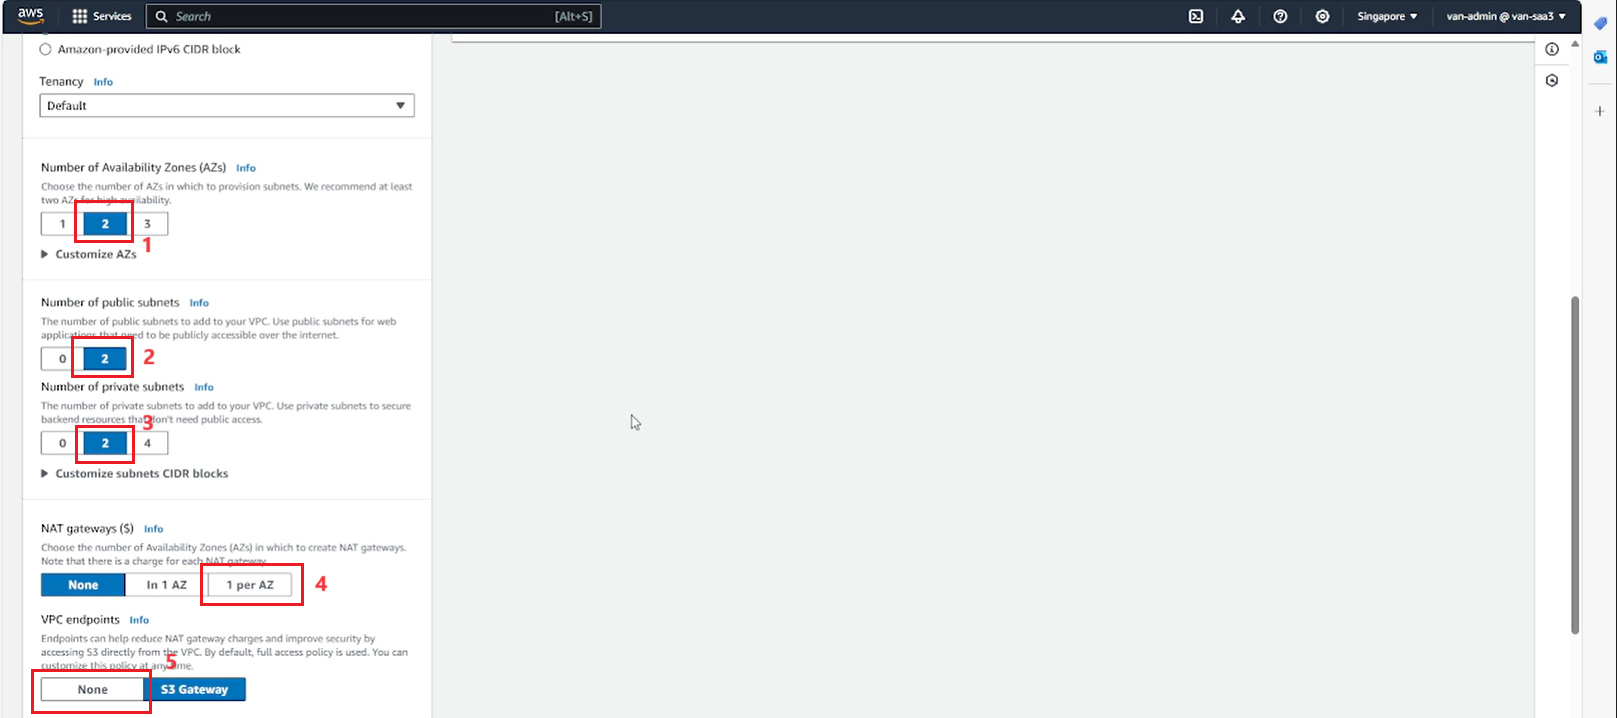
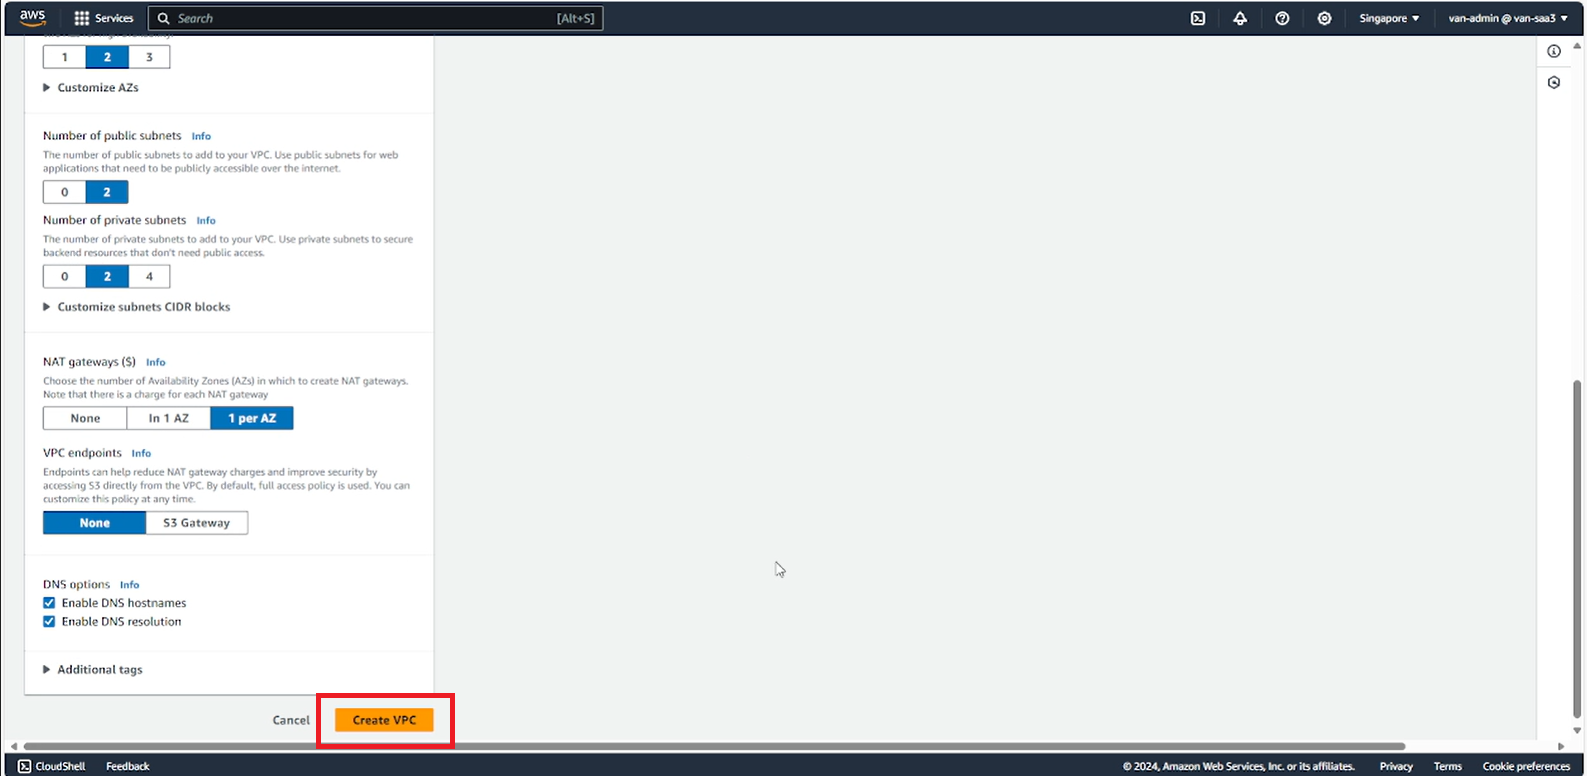
In the Number of Availability Zones (AZs) section, select 2 AZs.
-
In the Number of public subnets section, select 2 subnets.
-
In the Number of private subnets section, select 2 subnets.
-
In the NAT gateways section, select 1 per AZ.
-
In the VPC endpoints section, select None.
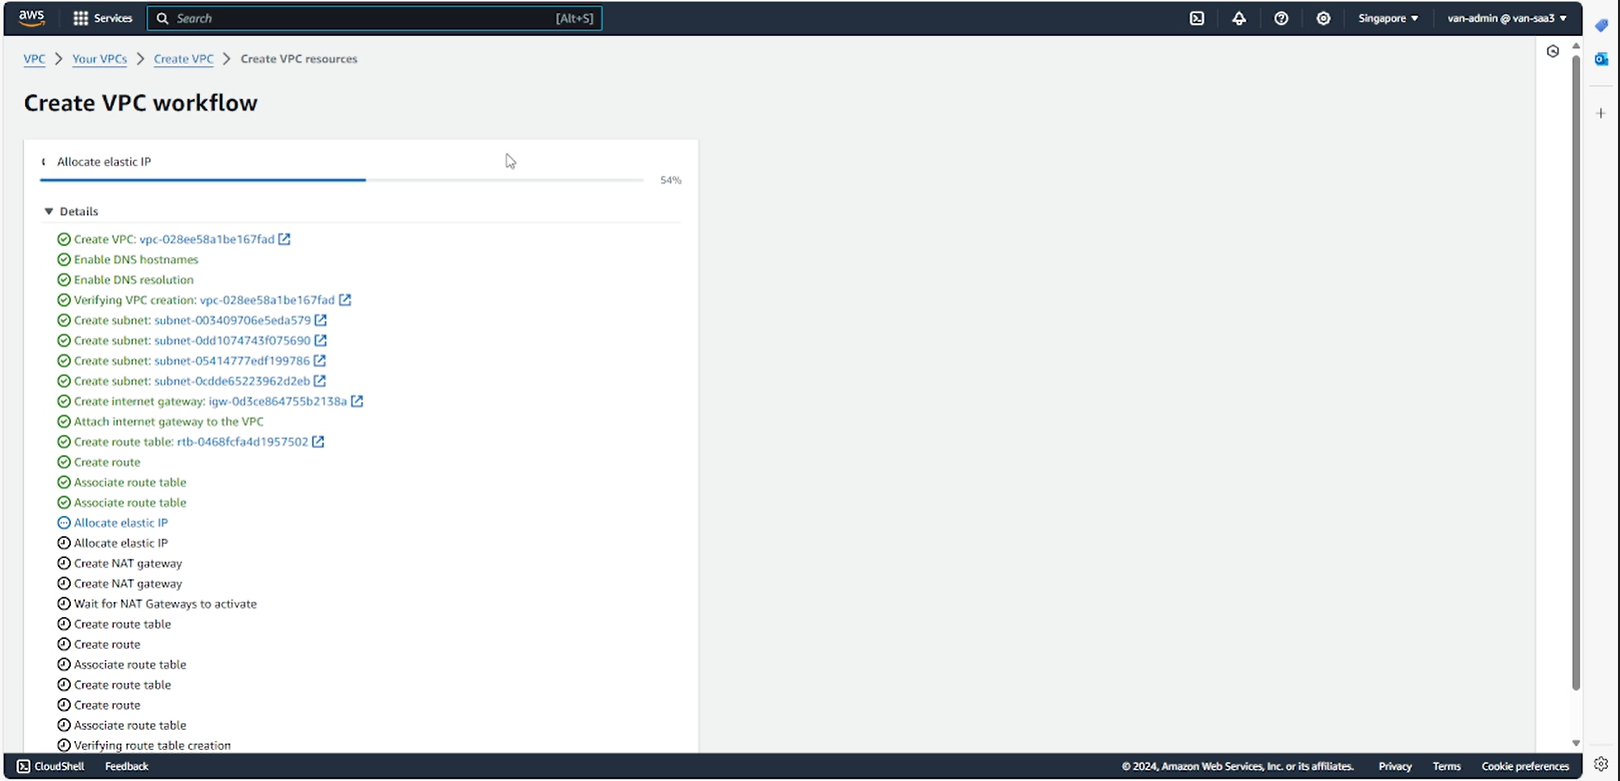
- Review the options and confirm the creation of the VPC Create VPC.
- After the VPC is created, check the internal components of the VPC such as subnets or routing tables to see if they are correct.
- public subnet routing table: routes traffic in the VPC and out through the internet gateway, shared by both public subnets.

- private subnet routing table: routes traffic in the VPC and out through the NAT gateway, each routing table is used for each private subnet and the NAT gateway corresponding to that subnet.
